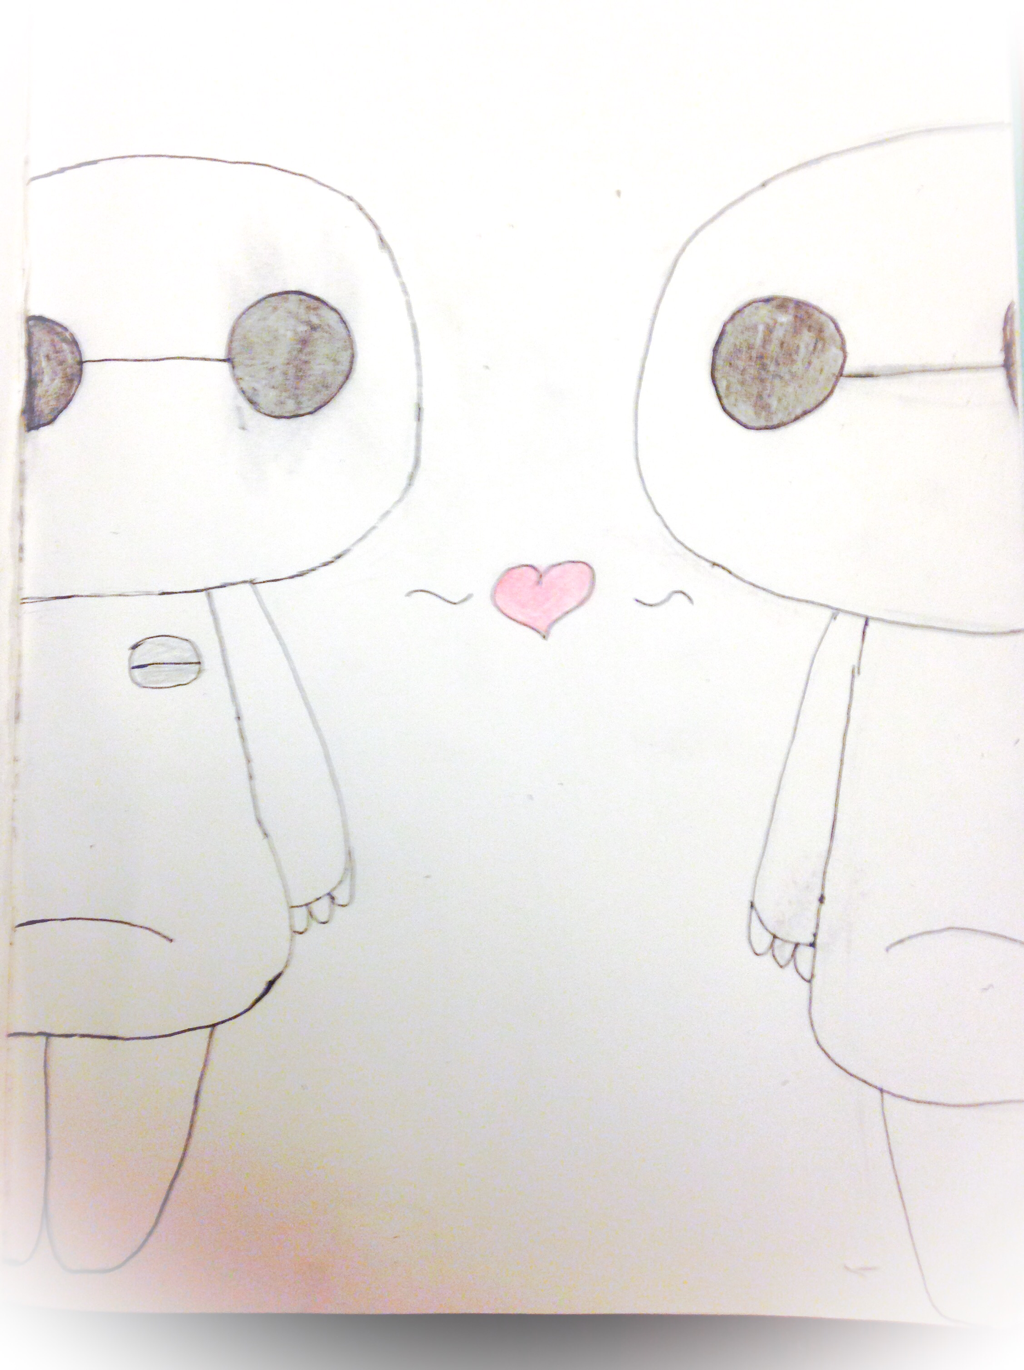
 This is my first step by step drawing tutorial for my 2 week happiness project challenge. This as you can tell by the title is about how to draw a cute baymax pair. I found this idea of half a baymax on the internet and decided to make a cute pair because the left side looked bare. 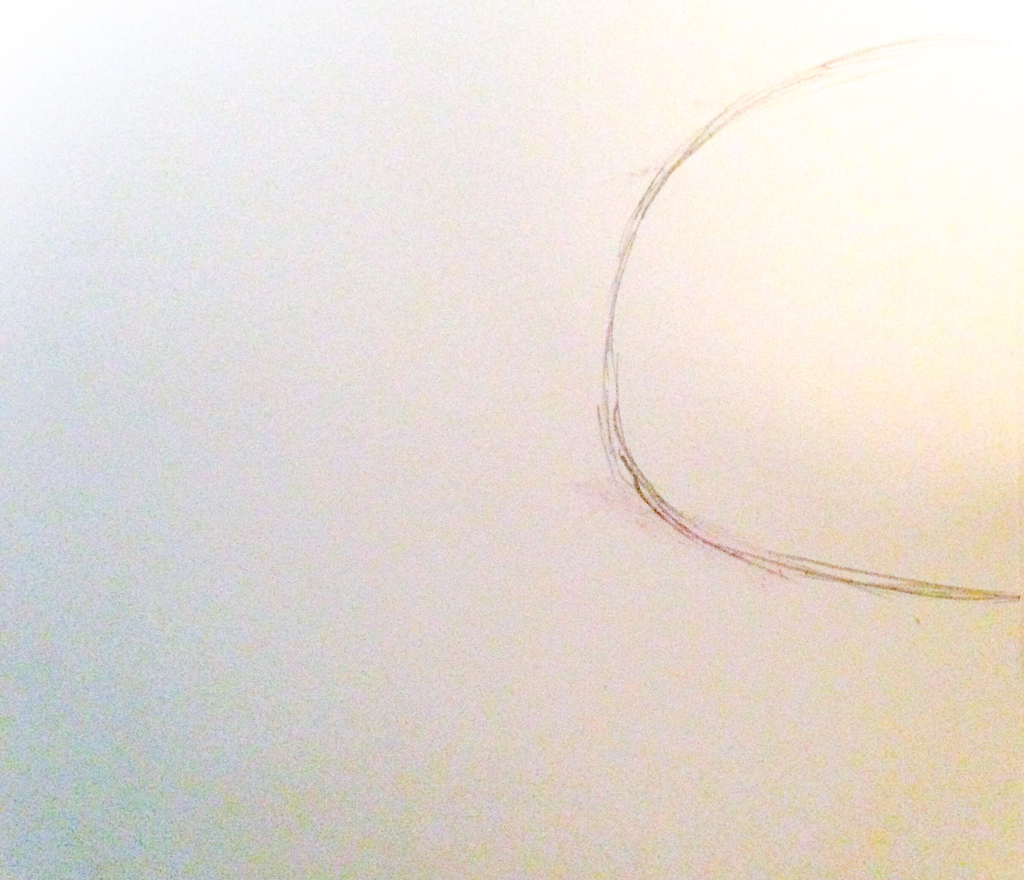 1. First draw a half circle going off the page.  2. Now sketch a line for the body and a skinny to fat line for the arm. 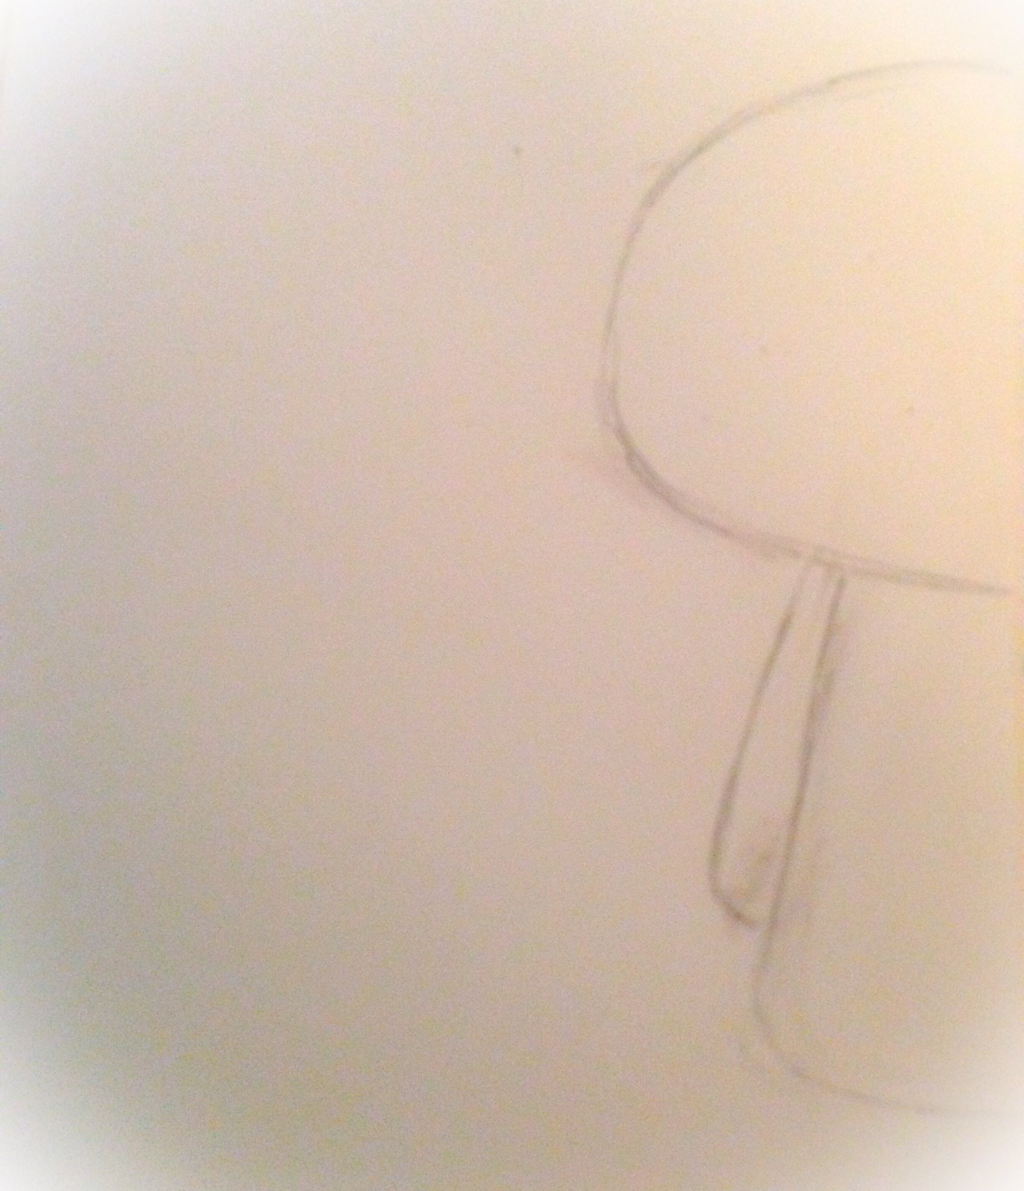 3. Round off both the arm and the body, in a sort of oval shape. 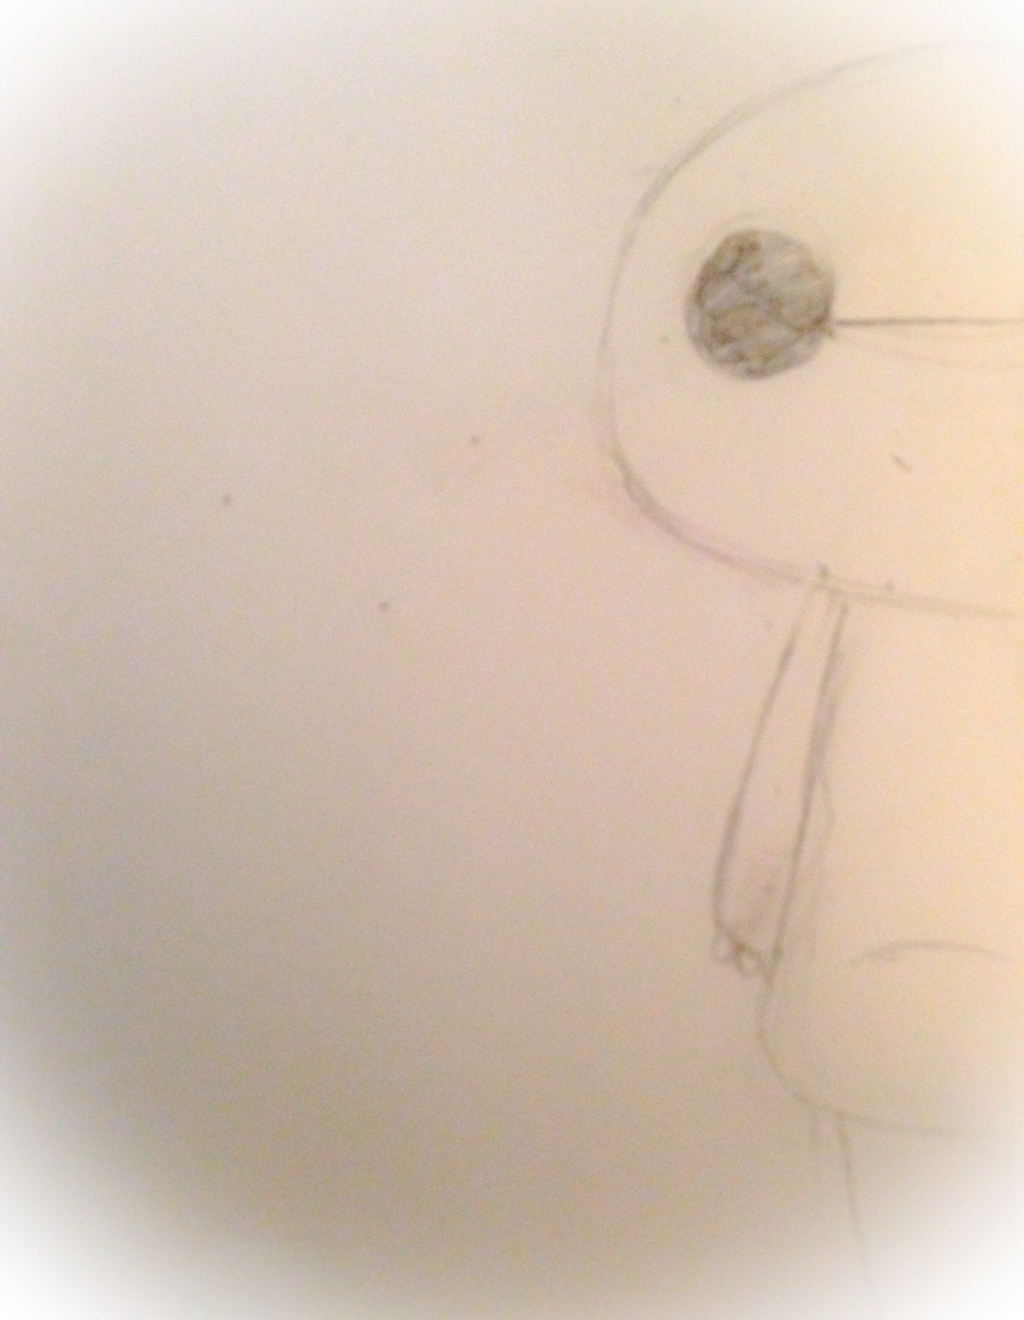 4. Now draw the small fingers on the hand and draw the eyes. A dark circle and line. 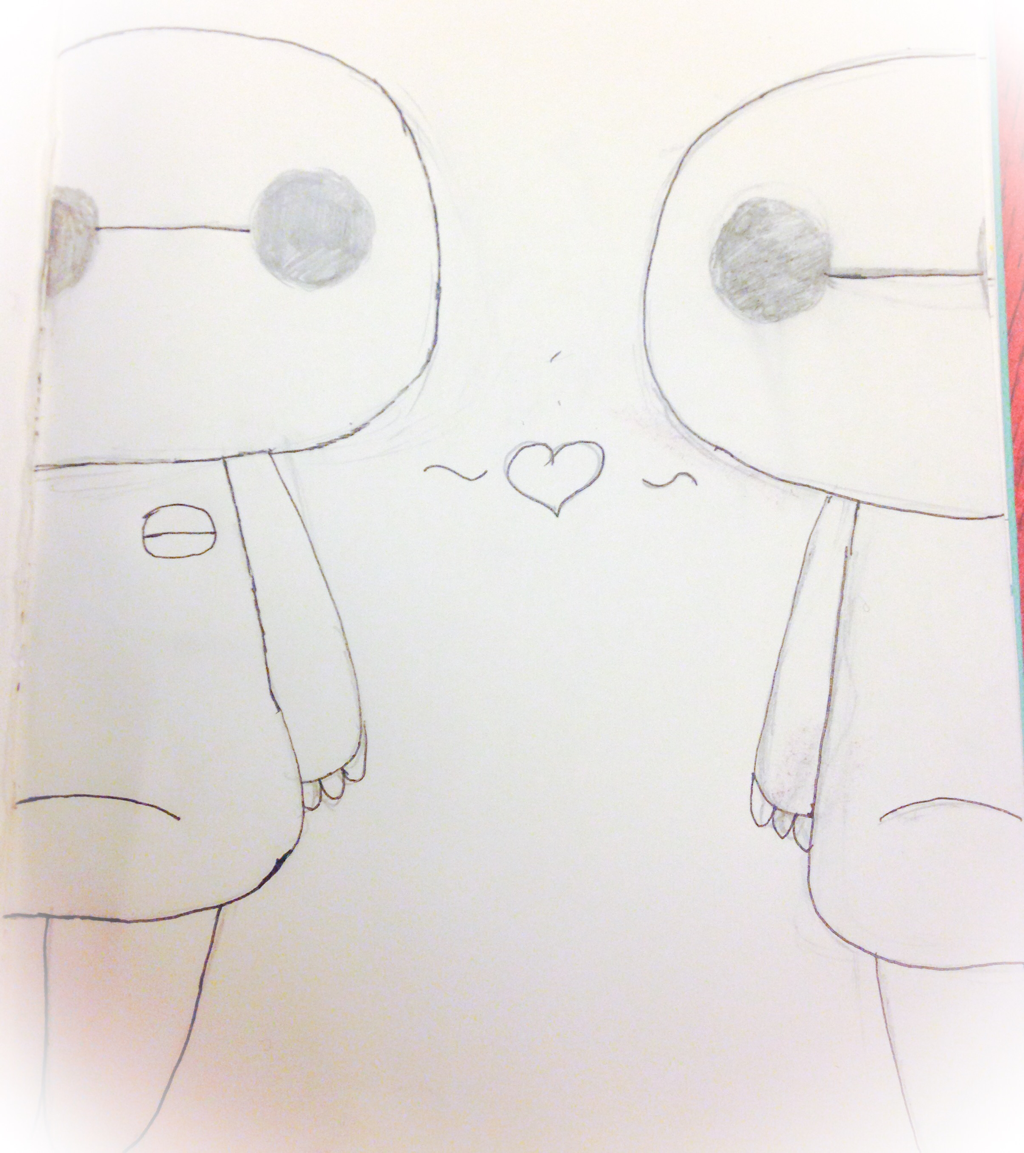 5. Now draw the same baymax but in the other side. You could add a button and heart too. 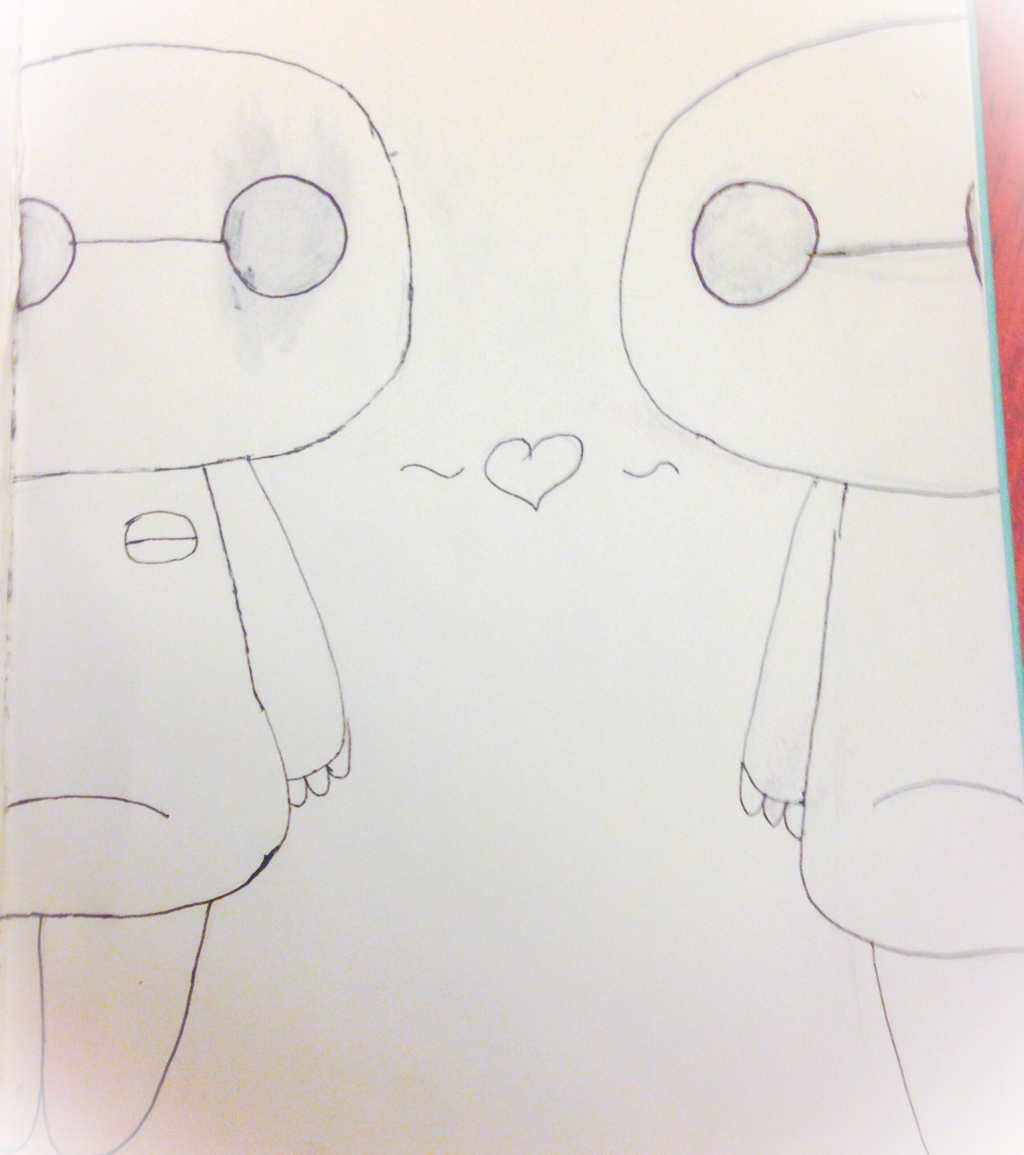 6. Use a rubber to rub out the grey lead lines. 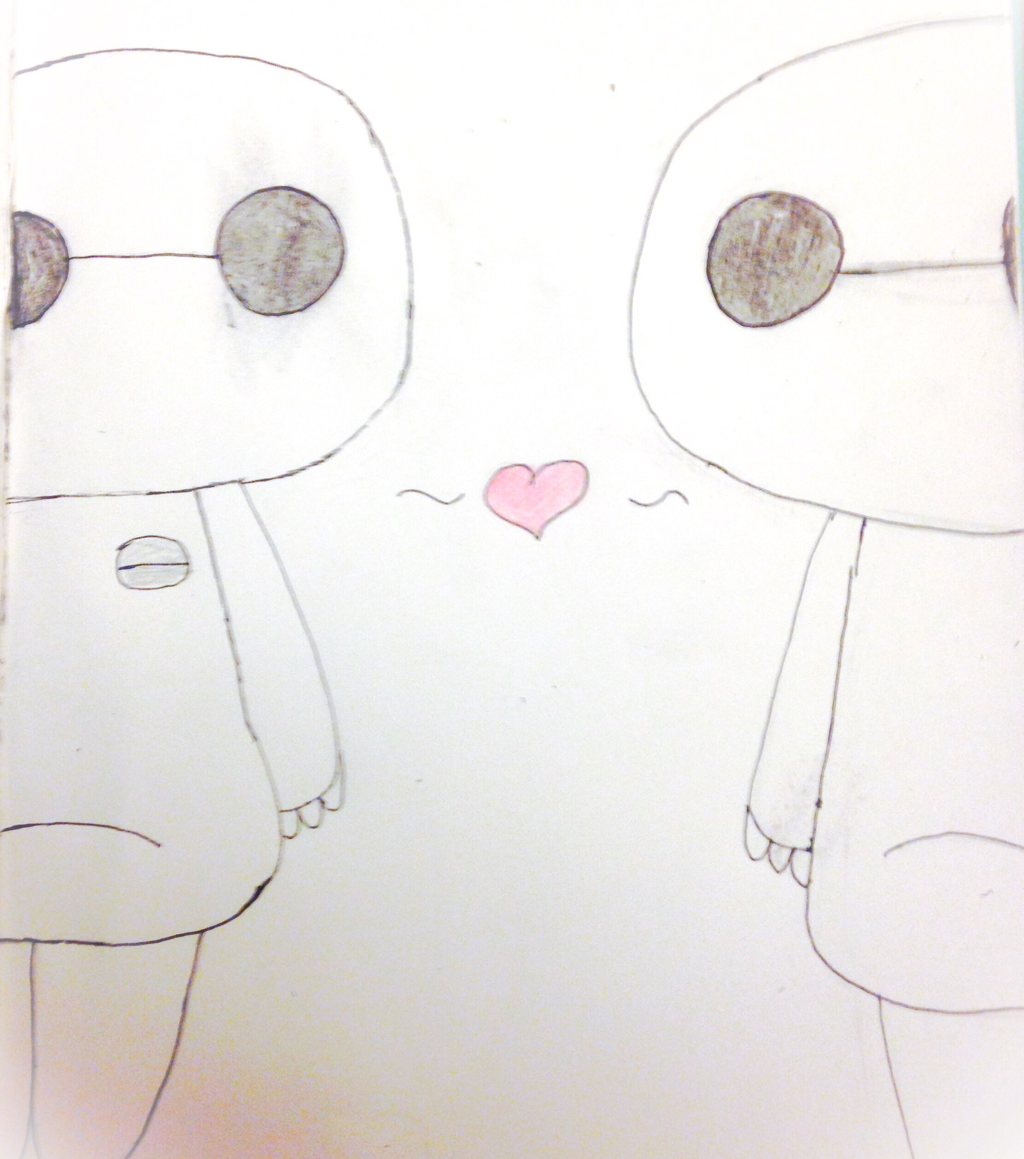 7. Then colour in the drawing however you want. I used watercolours.
0 Comments
 Sorry I haven't posted in a week. My family has gone through some tough stuff lately. For my health school project I have to do a happiness project. One part is a 2 week project, we have to do something that makes us happy. We all know drawing and colouring makes me happy. So for the next 2 weeks I will be doing a drawing everyday. I also decided that I will post for every drawing I do everyday, a step to step instructions on how to draw it. So it will benifit both of us. So from what I said you will get a post daily of step to step drawings or even just the drawing. I will try but I might not have time cause homework.🎨
Hey guys how's your holiday or weekend been mines been good. On Friday I looked for inspo for my blog posts and came across this idea (artists block). I always have trouble with artist block. Btw artists block means when you can't think of something to draw, paint, ext. The real definition off the internet is when you run out of ideas to draw things off, and temporarily loose all motivation to do anything art related. There are a lot of things you can do when you suffer from artist block. Here are my top 5 tips.
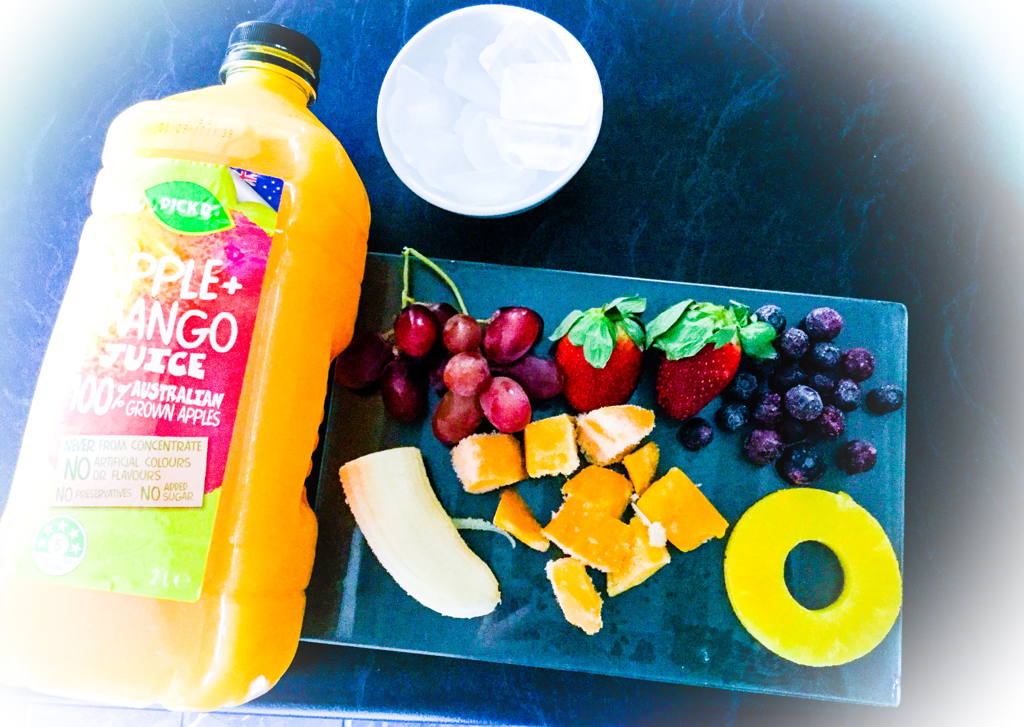
First you can go on Pinterest for inspo. It's a great way to get inspo for anything. I use Pinterest a lot for inspiration on things to draw. I have even made my own Pinterest board. If you need inspo you can check it out (Taypaints) called drawing inspiration. I add new additions to the board regularly. Secondly you can look at picture story book. They are a great way to get inspo. You can either draw things from your favourite books or get ideas for greater ideas from them. As well as picture story books being really good novel books are good too. The descriptive writing can bloom new ideas. Thirdly you can watch movies, personally the best to watch is Disney. I think Disney is good because there are so many cartoon characters all different in their own way. I would recommend to watch Tangled, Aladdin, frozen and lion king.It also can distract you by listening to the fun music. I love to jam to Disney music drawing, on the bus, in the car and doing homework. So to help with artist block listen to Disney music or watch Disney music. Fourthly you could look on the internet. The internet can help you in many ways including helping with artist block. You can either search up photos of drawings for inspo, ideas to draw on blog posts and websites. They are just 3 ways to get inspo off the internet, there are so many pother ways. Lastly you can look at drawing or art books. You can find them in a art store or even a book store which is where I get all mine. The art books can either be step to step drawing books or drawing books about movies and the art/drawings behind it. It's an awesome thing for inspo or instructions on how to draw. I always used to use them to build up my skills and still sometimes use them. These were just 5 things you can do if you are suffering from artist block. Any of these are sure to help you get ideas on what to create. I would like to tell you guys a few things about my posting and days and what I will post on those days. I will post every Sunday and will try to post on Wednesdays too. On Sundays I will post diys or step to step drawings and on Wednesday I post tips and tricks about art and other bits and pieces. I hope to see you guys next Sunday and hopefully Wednesday if I can keep it up with school work. Taylor💘 Hey in the holidays lately I have been trying to eat healthier but filling breakfasts. Did you know that breakfast is the most important meal of the day, I did. Well I have been drinking smoothies which taste great and are filling. Here are 4 smoothie recipes that taste delicious. Berry Smoothie!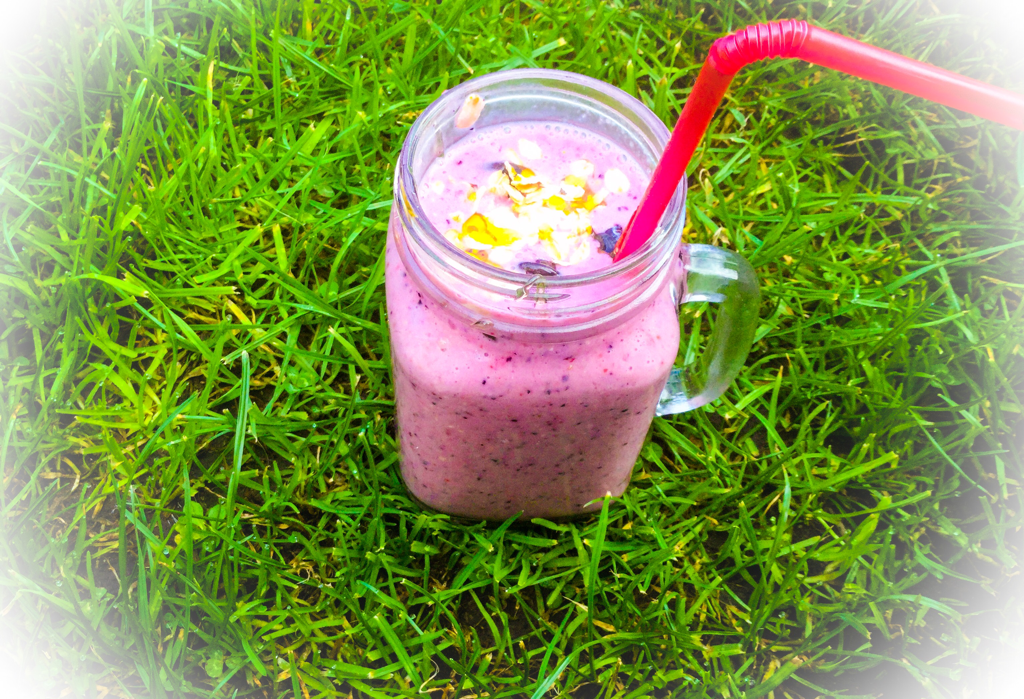 Ingredients:
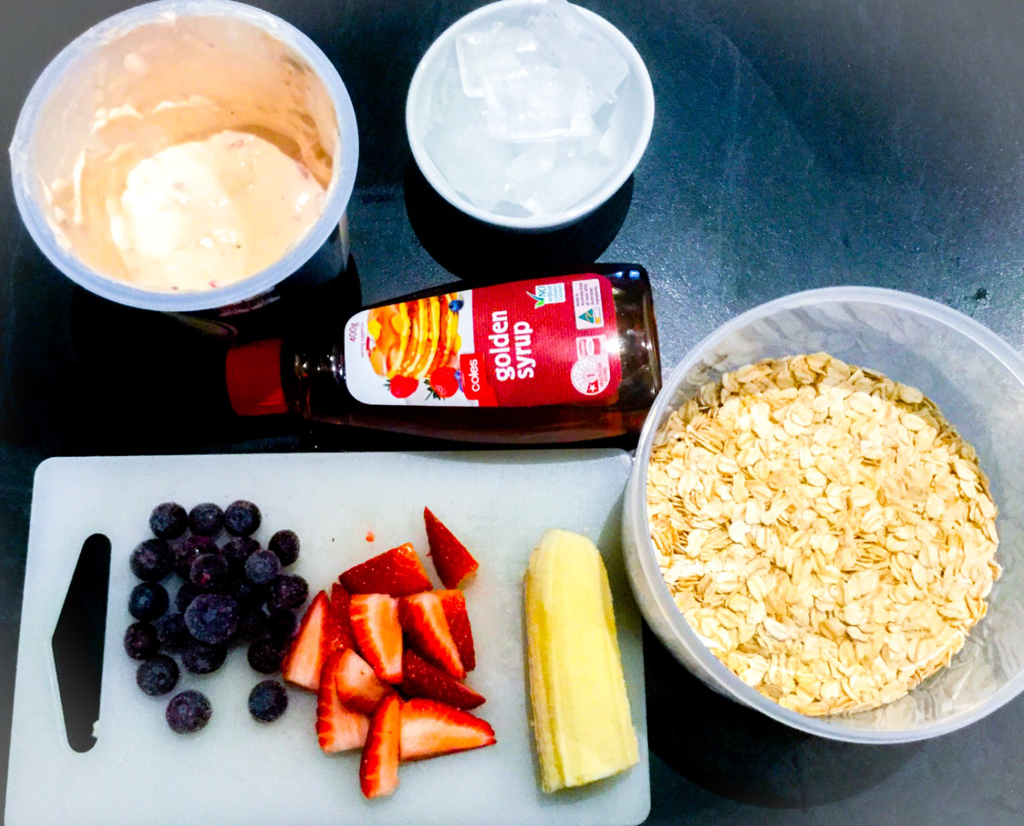 1. First cut up all the fruits and put into the blender. 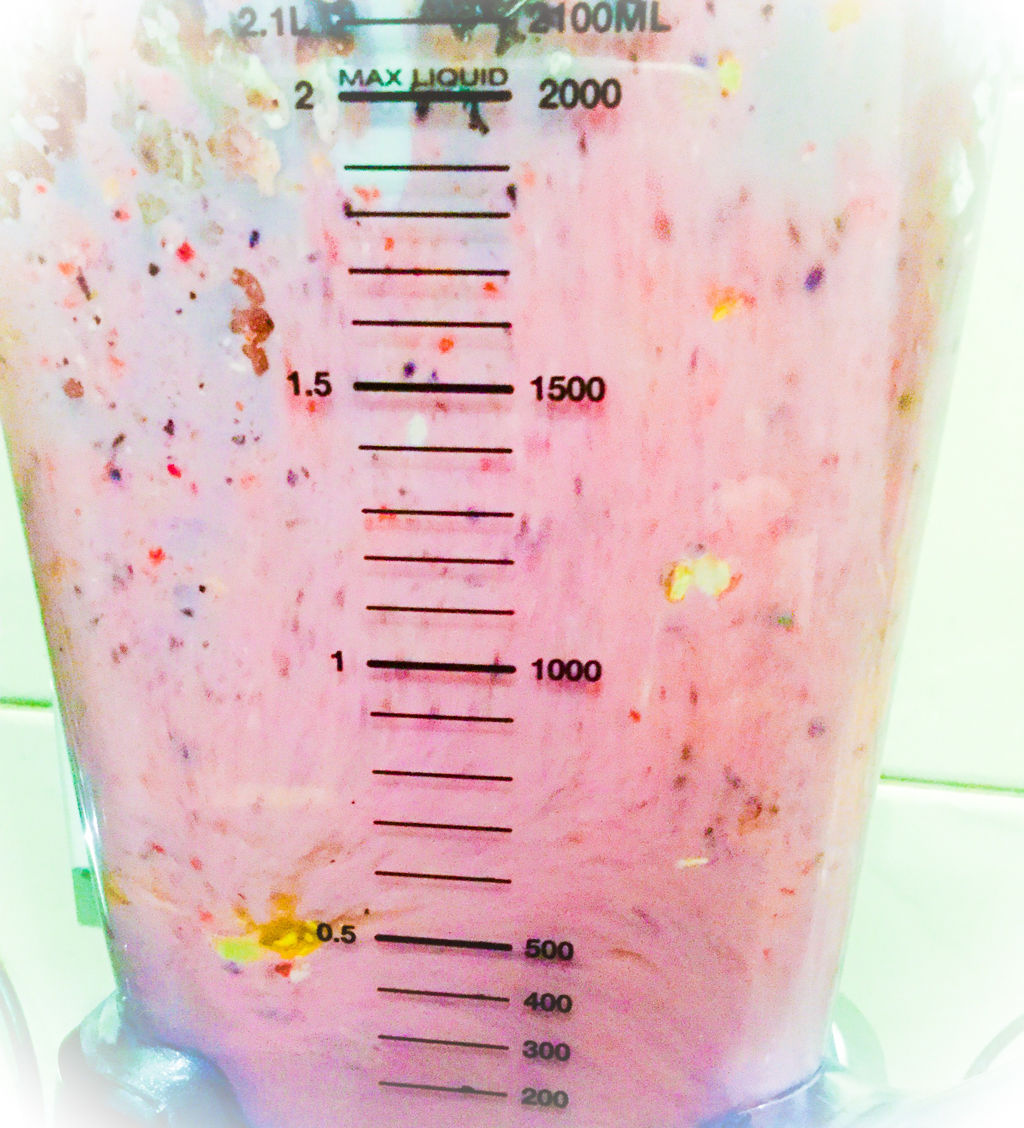 2. the mix in the blender. 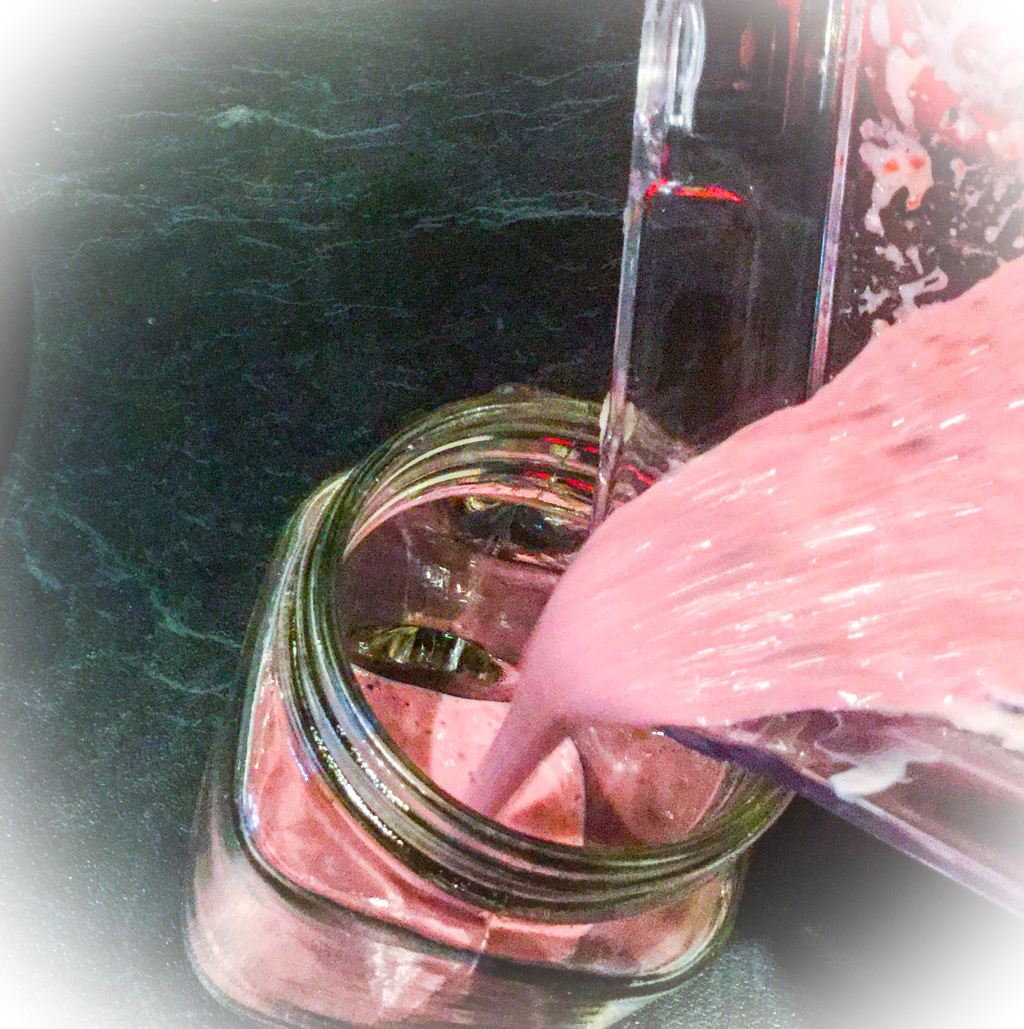 3. Now pour the mixture into the glass. 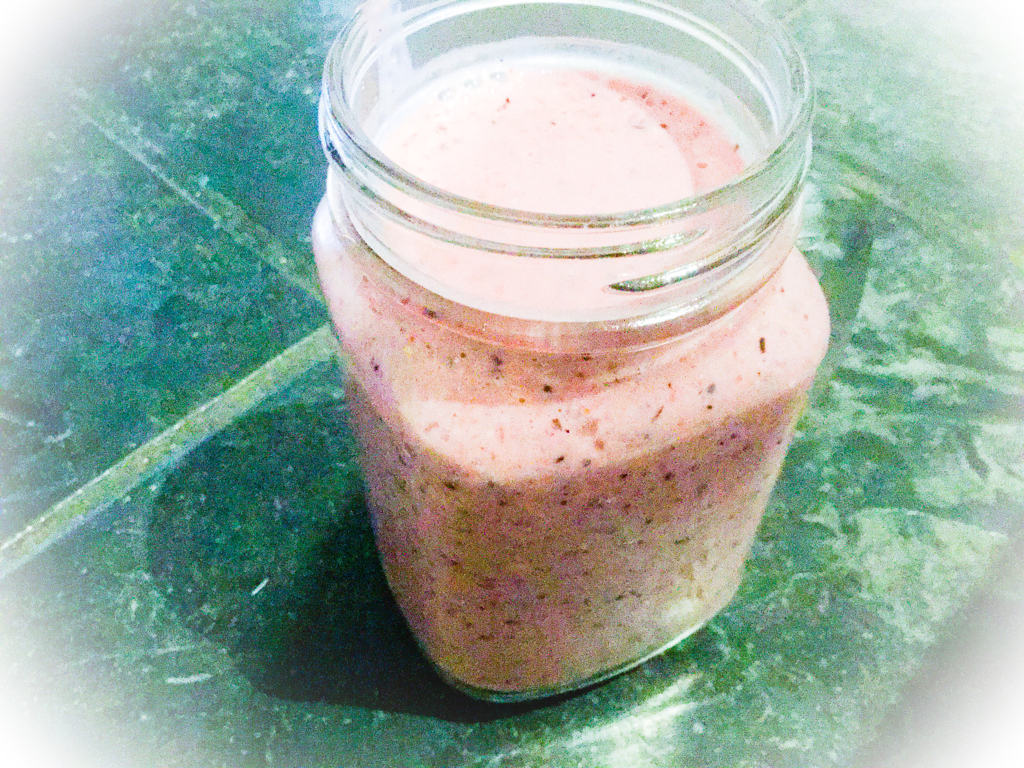 4. And your done to enjoy your berry smoothie. Tropical Smoothie!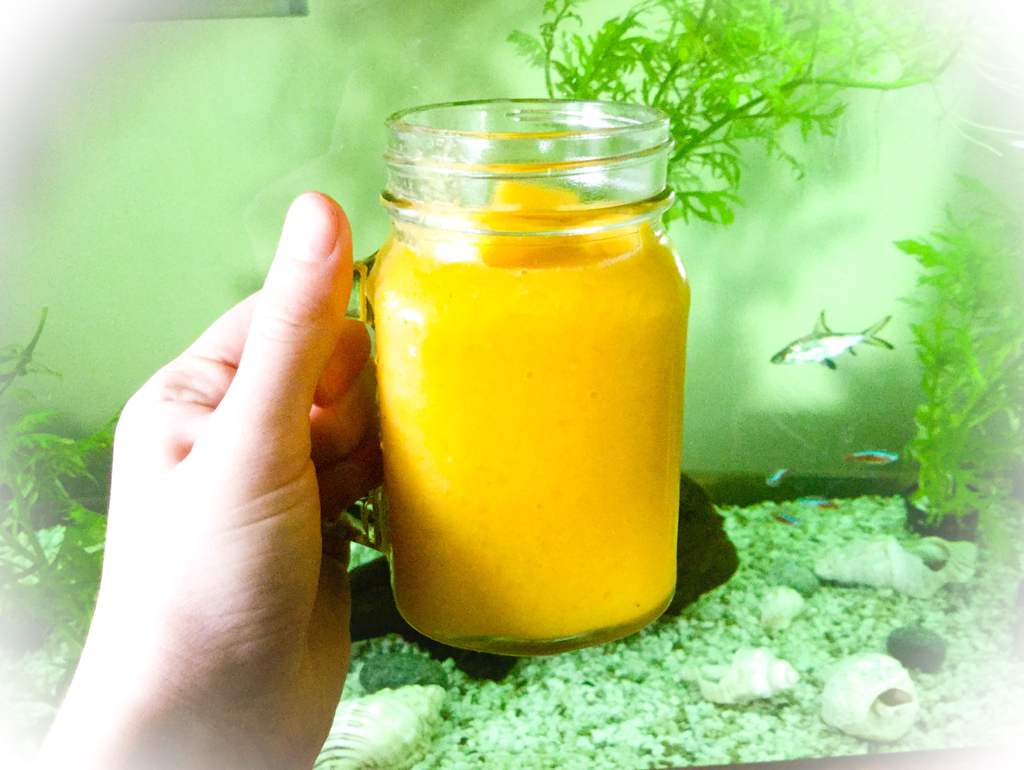 Ingredients:
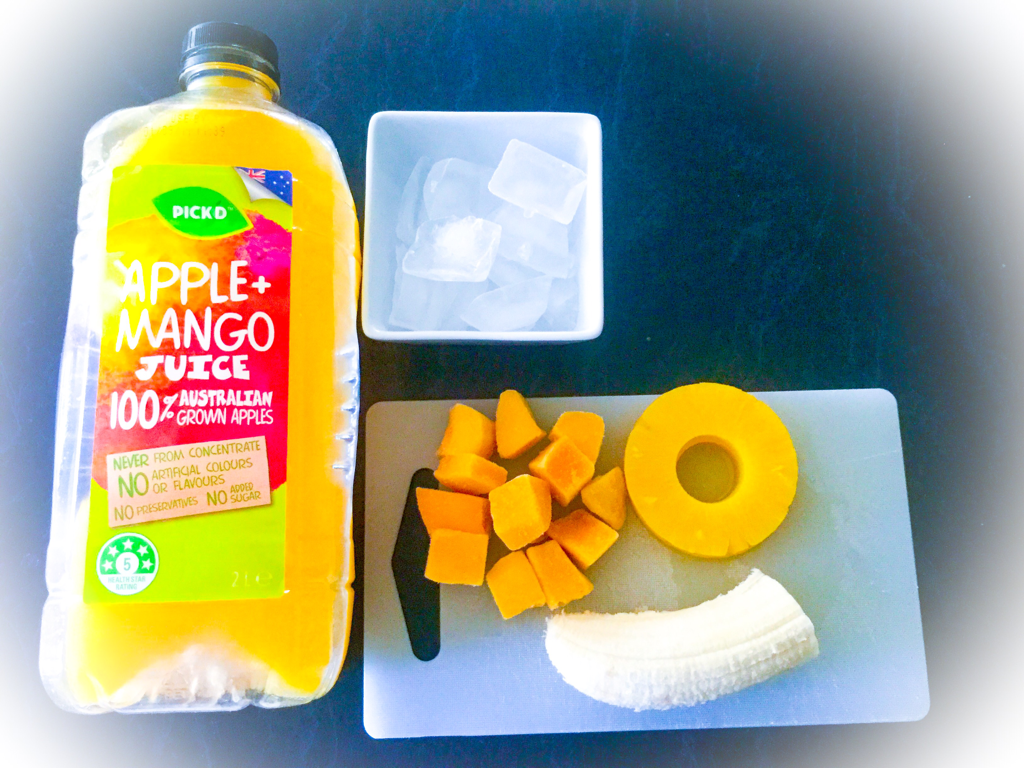 1. First cut up and prepare all ingredients, then put in the bender. 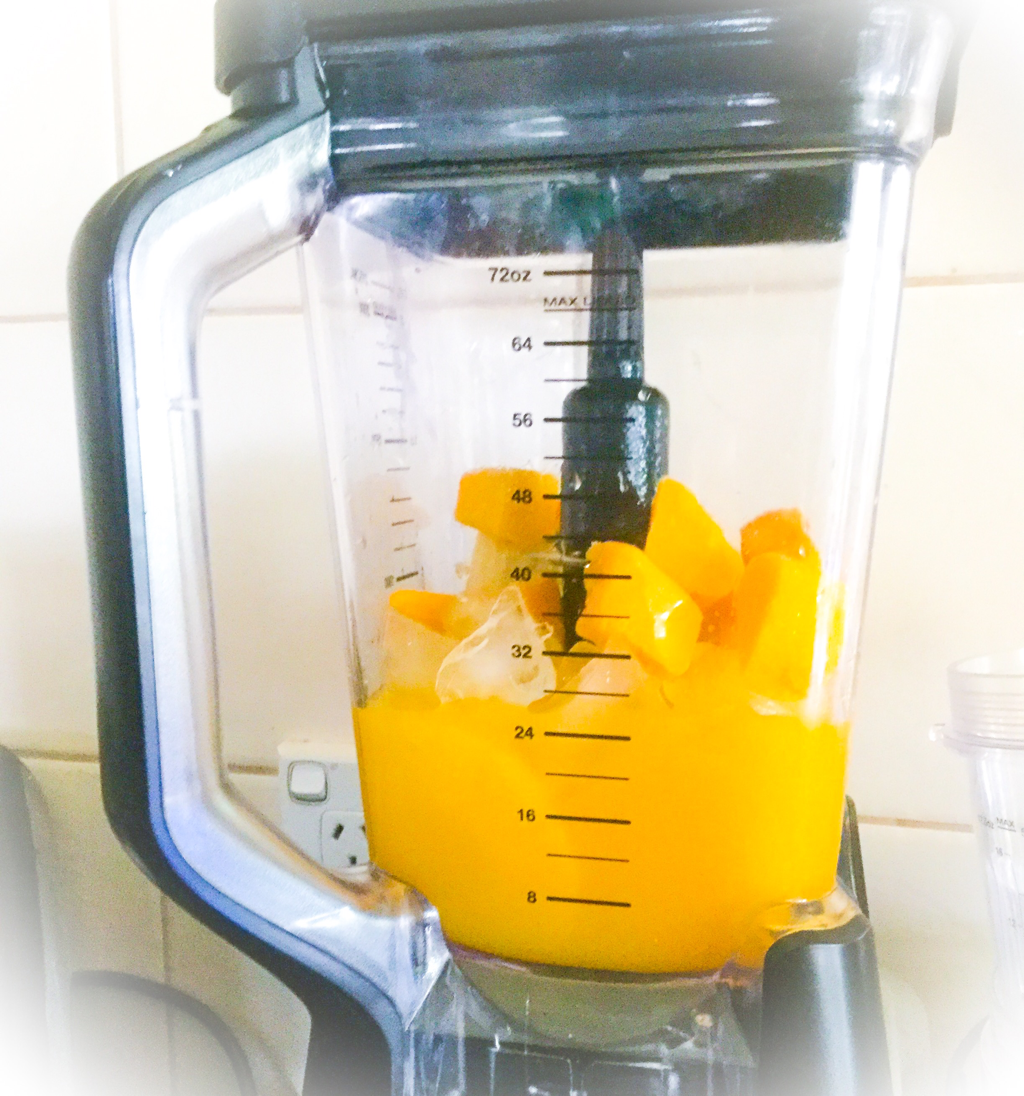 2. When all put in the blender mix well. 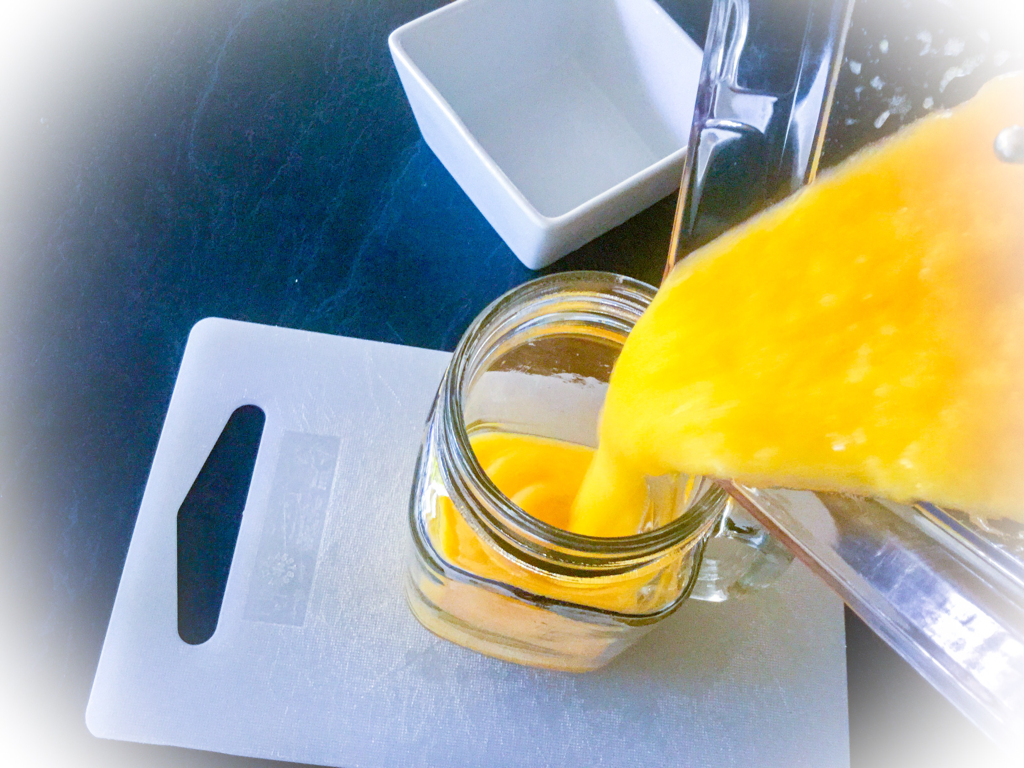 3. Pour the mixture into the glass. 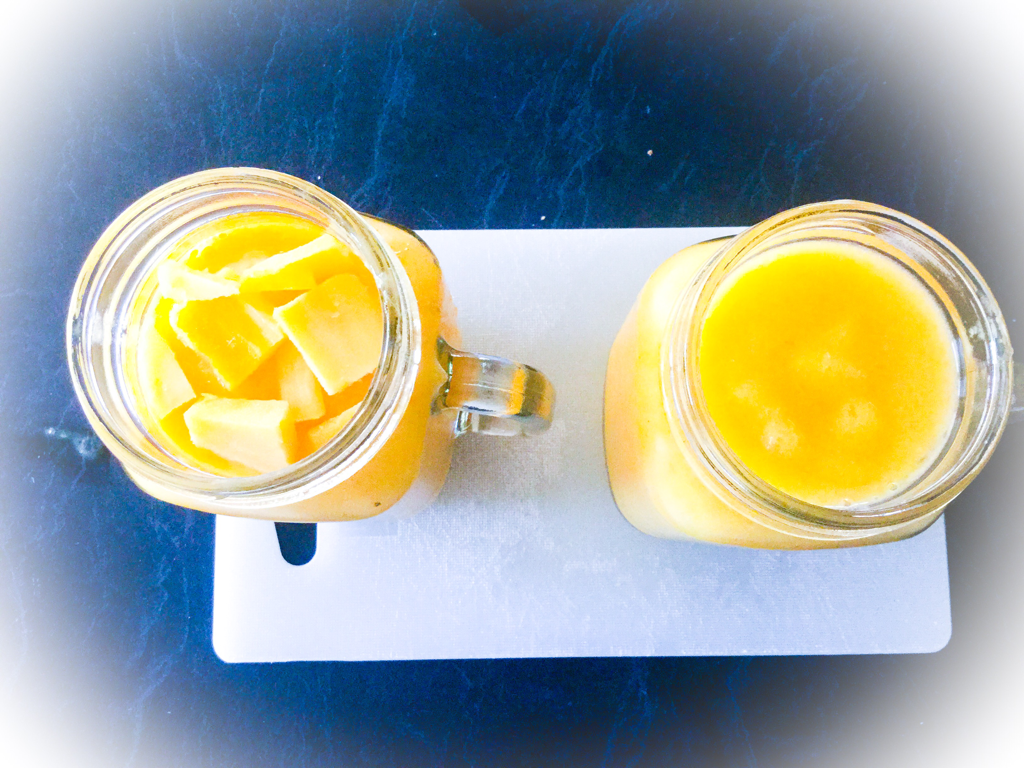 4. If you want ct up some frozen mango to put on top. This mix was for two because my mum wanted some so I just added a bit more of each ingredient. Field Berry Smoothe! Ingredients:
 1. Cut up all ingredients and put in the blender. 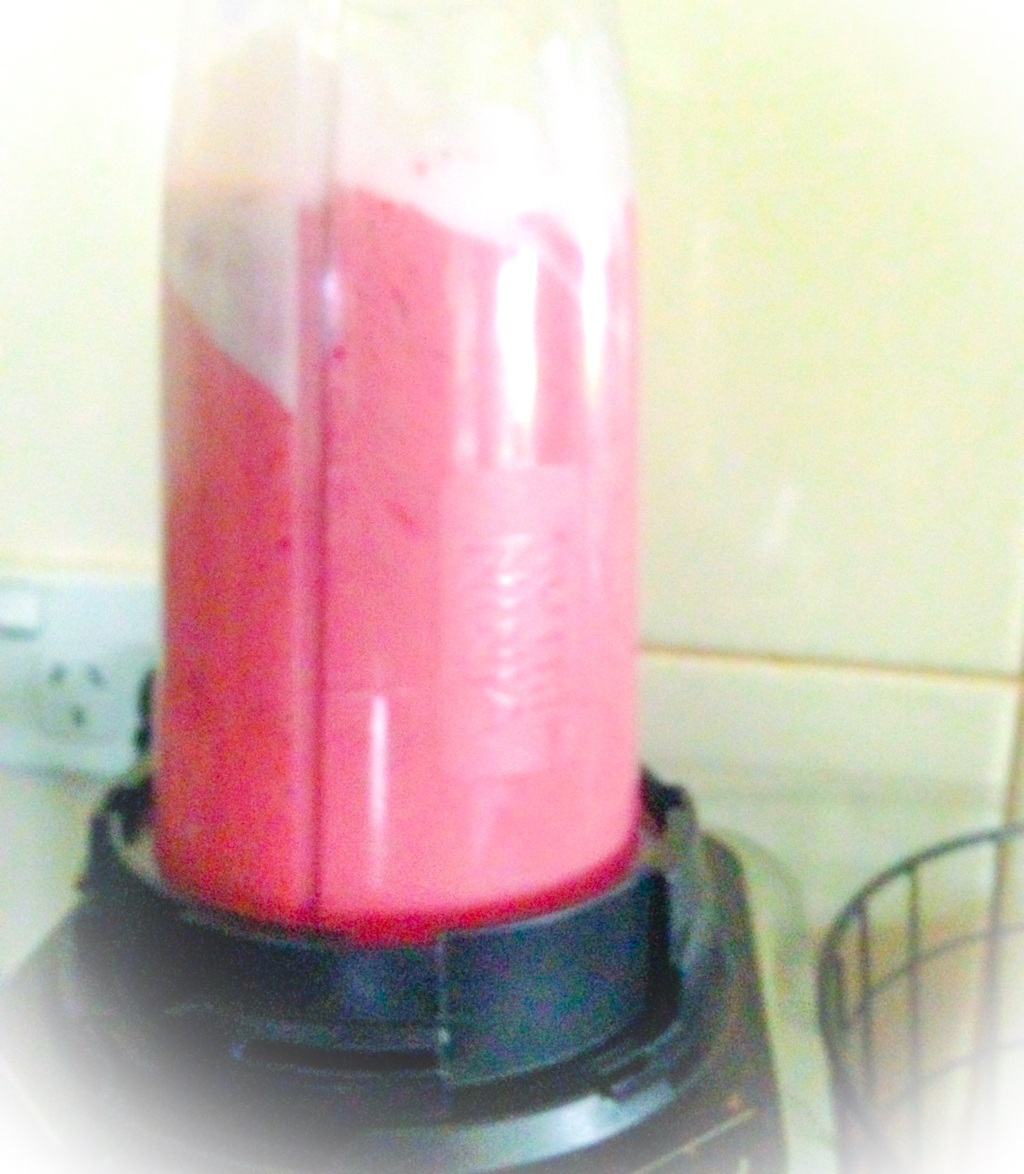 2. Mix all the ingredients till smooth. 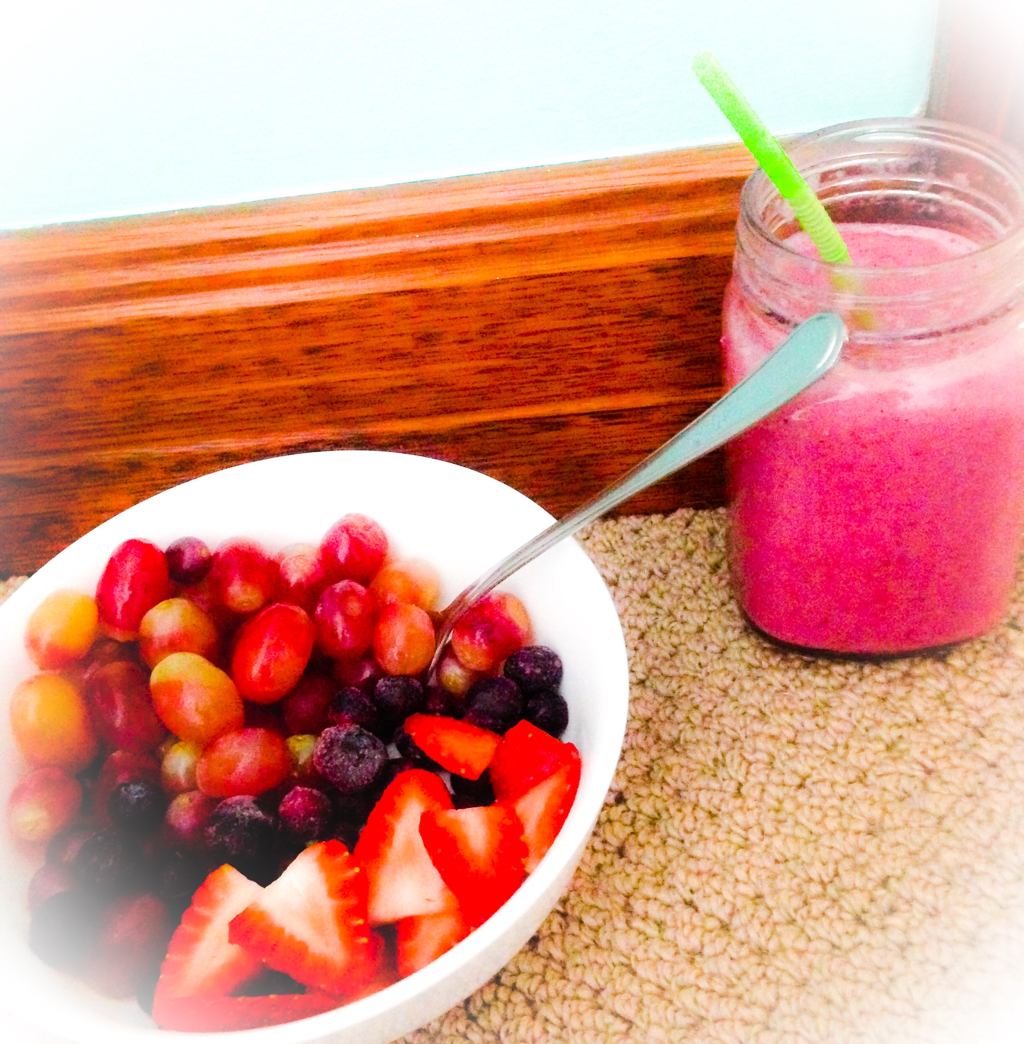 3. Then pour the mixture into the glass and your done enjoy. Fruit Salad Smootie! Ingredients:
 1. Slice all the ingredients and repare to go in the blender. 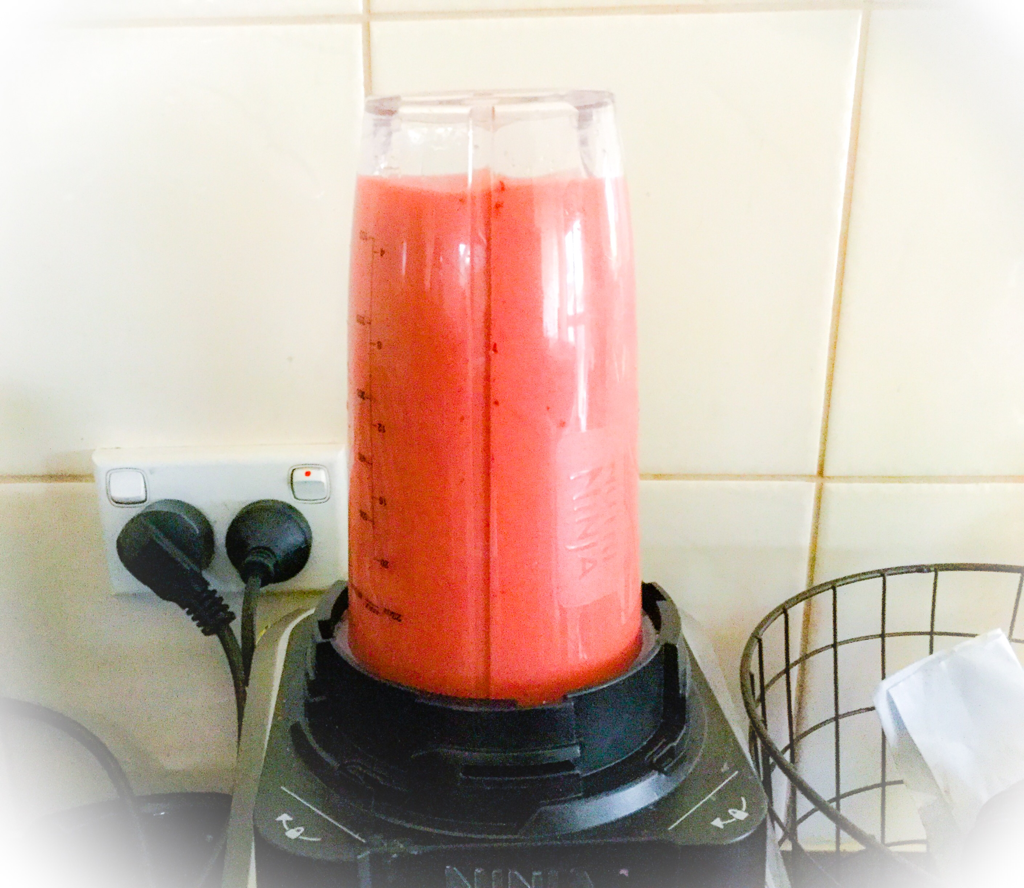 2. Blend all ingredients till smooth. Then pour in the glass 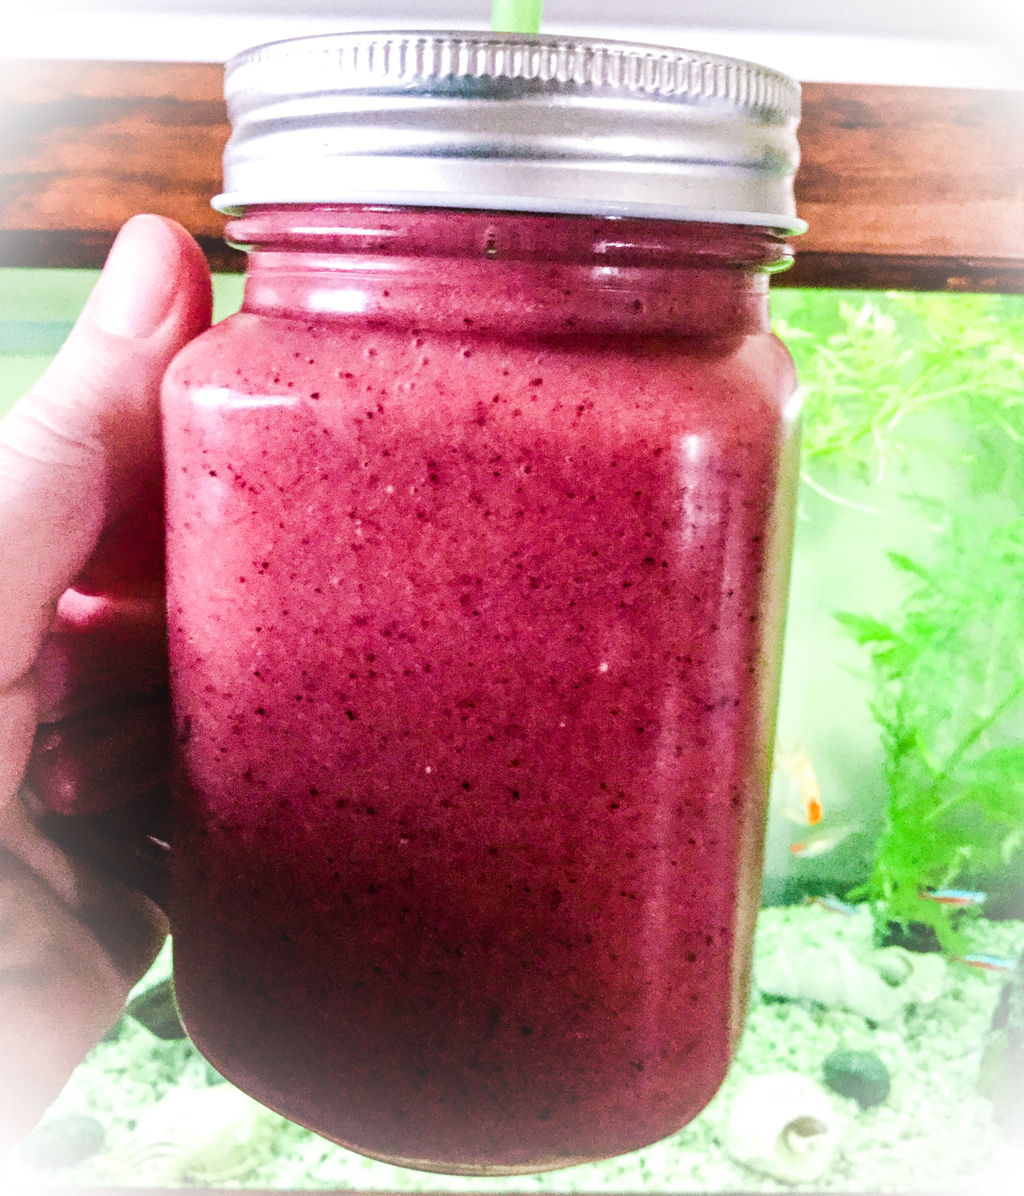 3. Now your done hope you enjoy this very fruity smoothie.
Sorry I didn't post on Sunday my iPad is getting fixed because it has a huge crack in it. Funny story, my phone fell on it a cracked it, but all good my phone is fine. Anyway I had to back it up because apparently they don't fix screens so I have to get a whole NEW iPad. So it has been backing up for almost 24hours and no luck (our wifi sucks). But I was lucky enough to get my mums iPad and use that which is what I'm doing right now. So on Saturday my friend and I watched the Dance Academy movie and loved it. I recommend you guys to watch it! It inspired me to do a few ballet drawings. I know this is not the best drawing, I am sure you guys could do better. But here is a few steps on how to draw this ballet styled drawing. 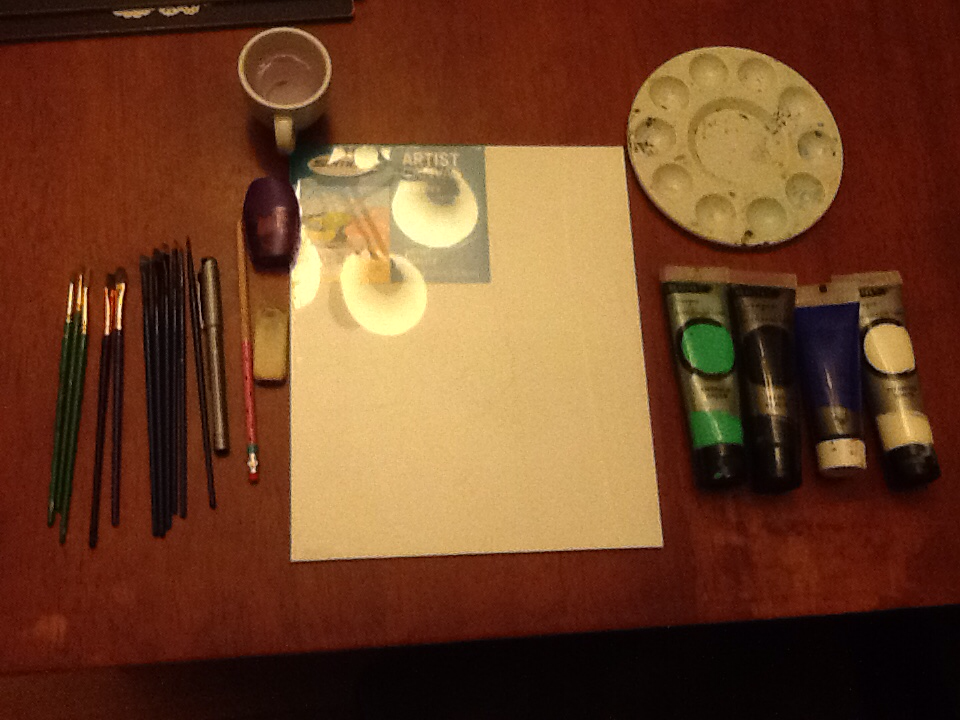 What you will need:
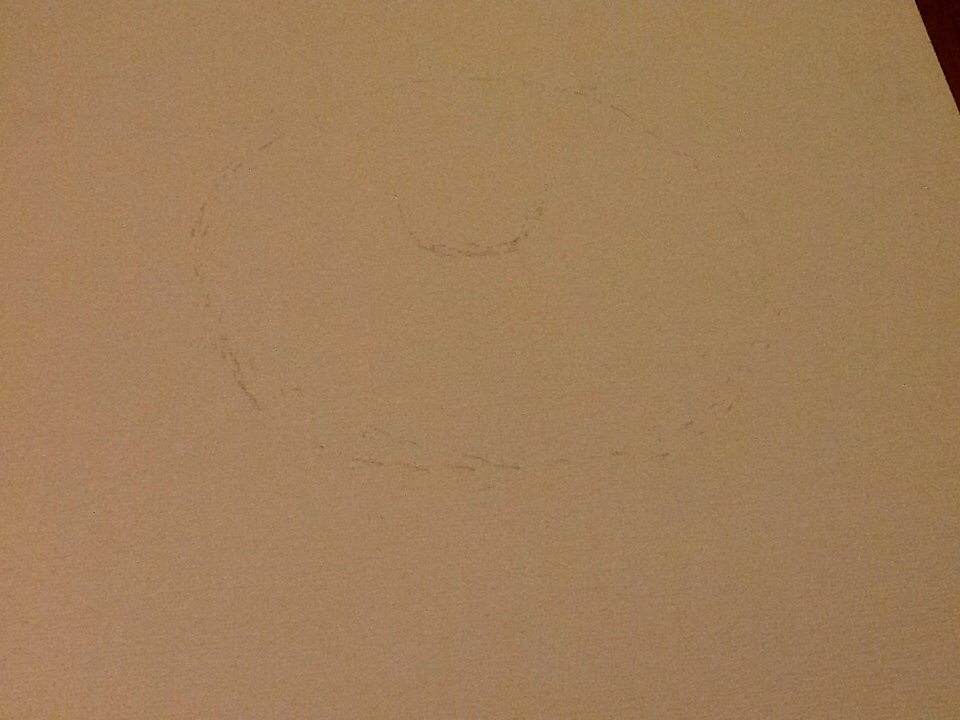 1. First draw a faint large circle for the tutu. Then add a small circle in the middle to plan where the body will go. 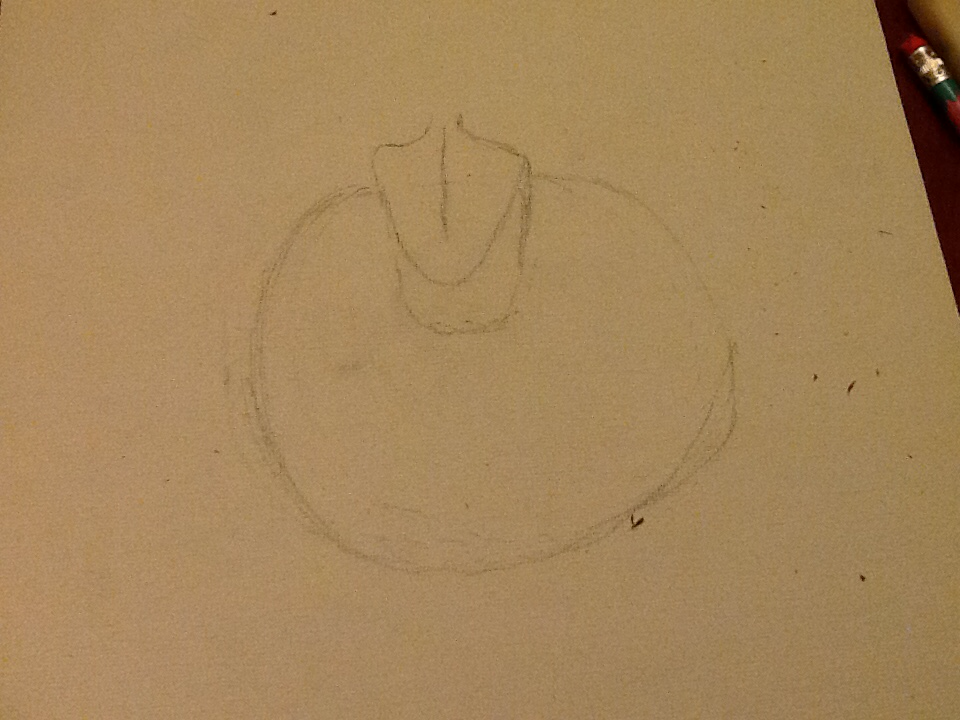 2. Now add a faint sketch of the back body. Two lines to form however long you want the back to be. Then do two bumps on each side to be the shoulders. Lastly connect all together with the neck. 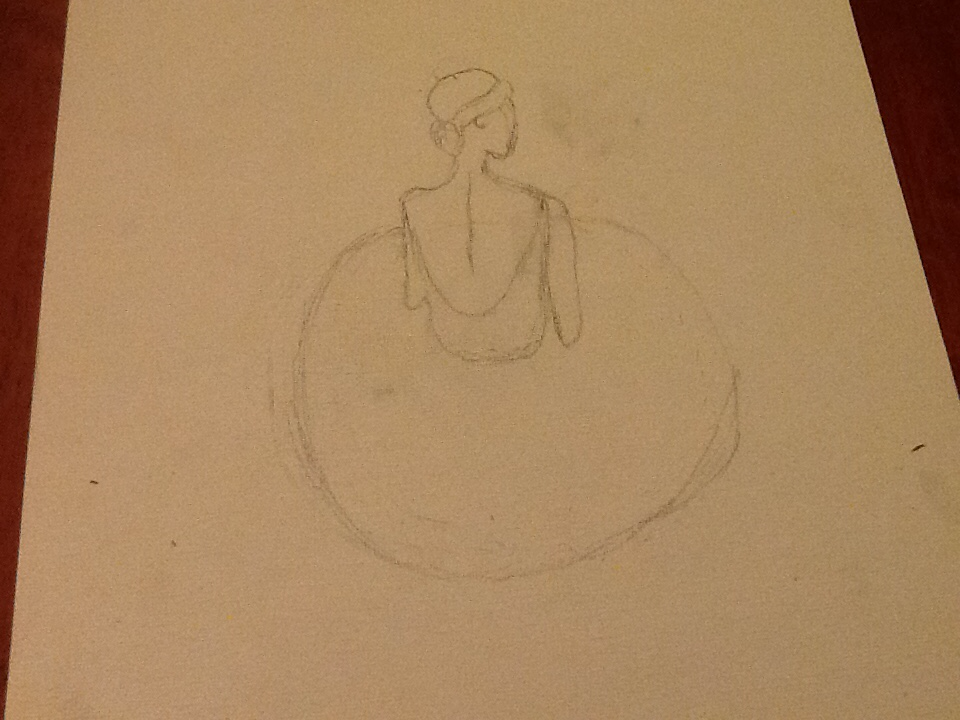 3. Now add a fine sketch of the head. The side view add a circular oval shape. Lastly add some haid however you would like. 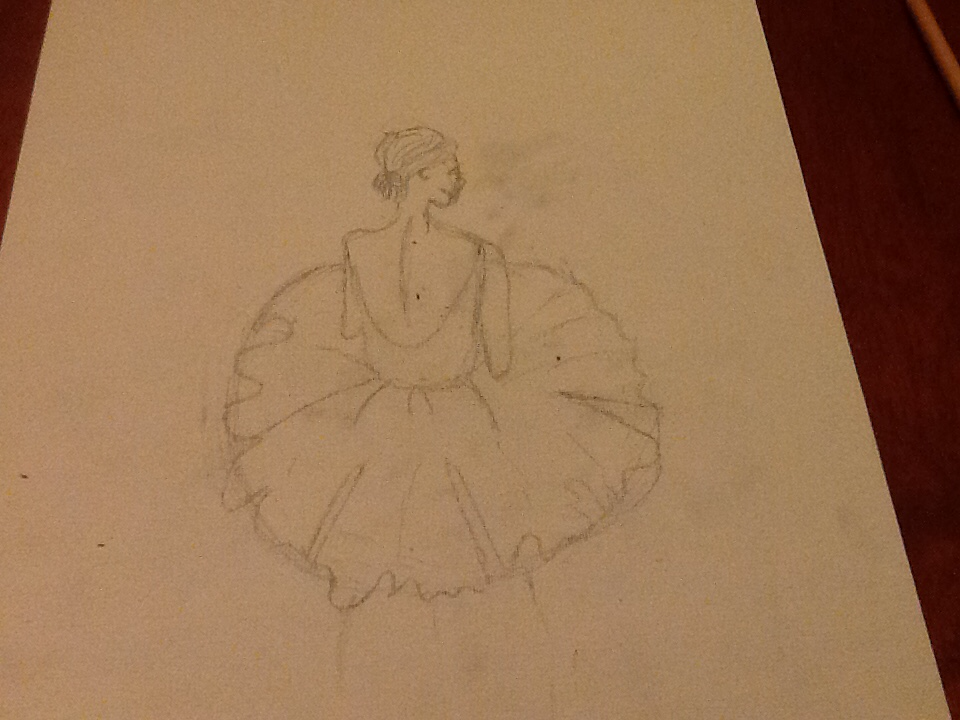 4. Now we are adding more detail to the tutu. Add some random swirls, little and big. Also some cuts and lines to add more definition. 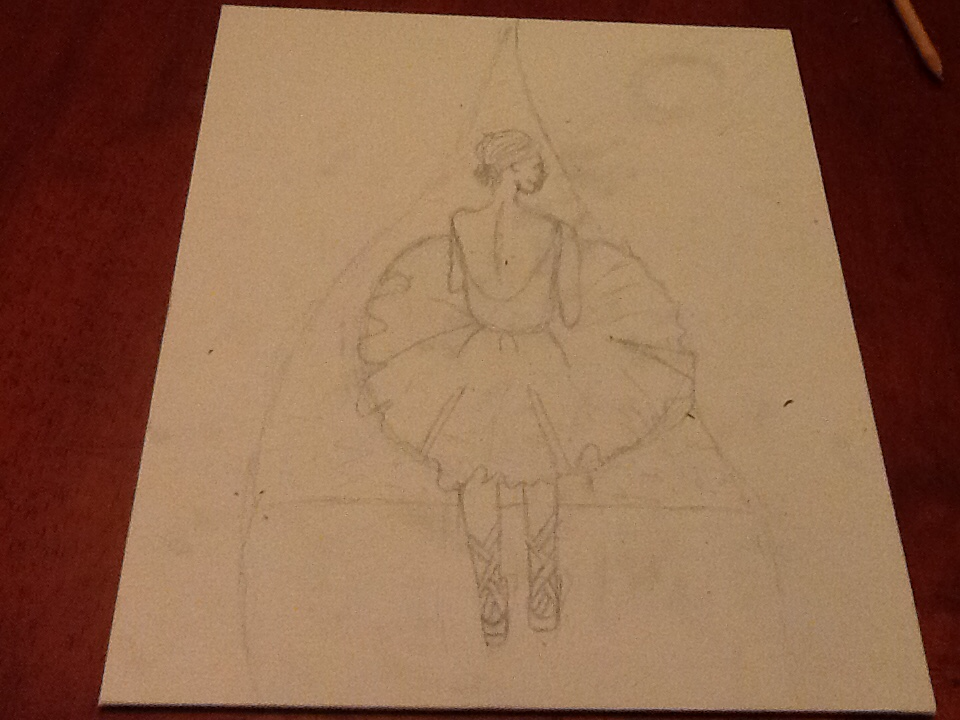 5. Now add the legs. Straight and curved at the ends. Also add the shoes stripes across each other. Also add a straight line for stage and wavy curves on each side for the curtains.  6. Now go over the work with a fine liner. Also rub off spare greylead lines. 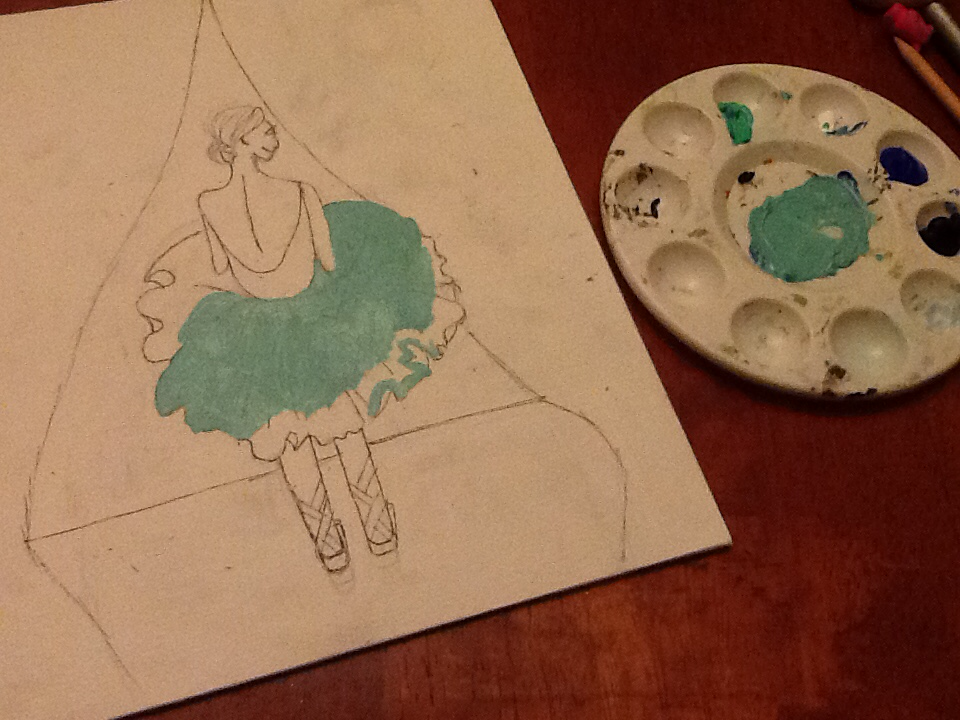 7. Now mix some blue, white and green to make a sort of aqua colour for the tutu and ballet slippers. 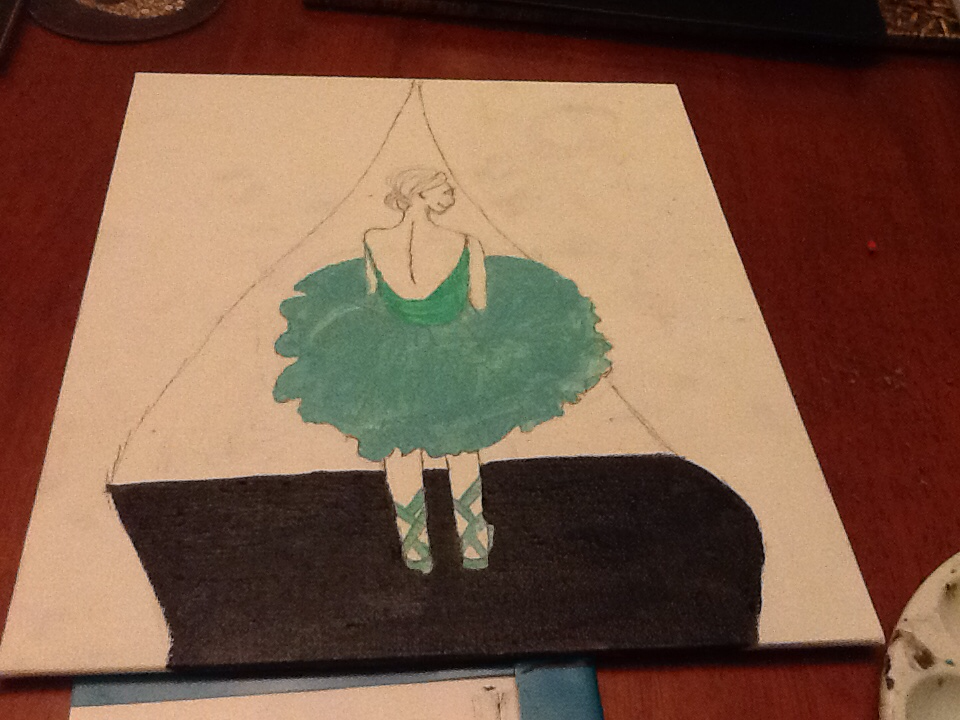 8. Now use black to paint to stage floor and use a mint green paint to colour the singlet. 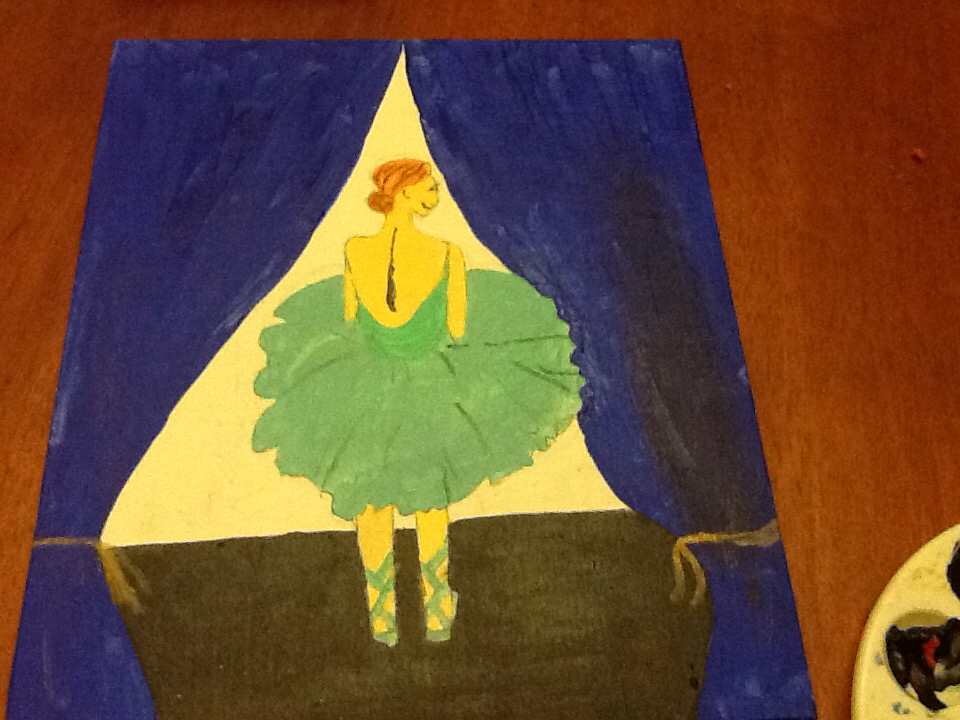 9. Last of all add a royal blue colour for the curtains, flesh tint paint for the skin, black paint for detail, brown for hair and gold for the ropes to hold the curtains.
 1. First let's do the cloud. Do a straight line and have curves on either side. Then do another curve on each side. Last of all add one last curve to connect them all together. 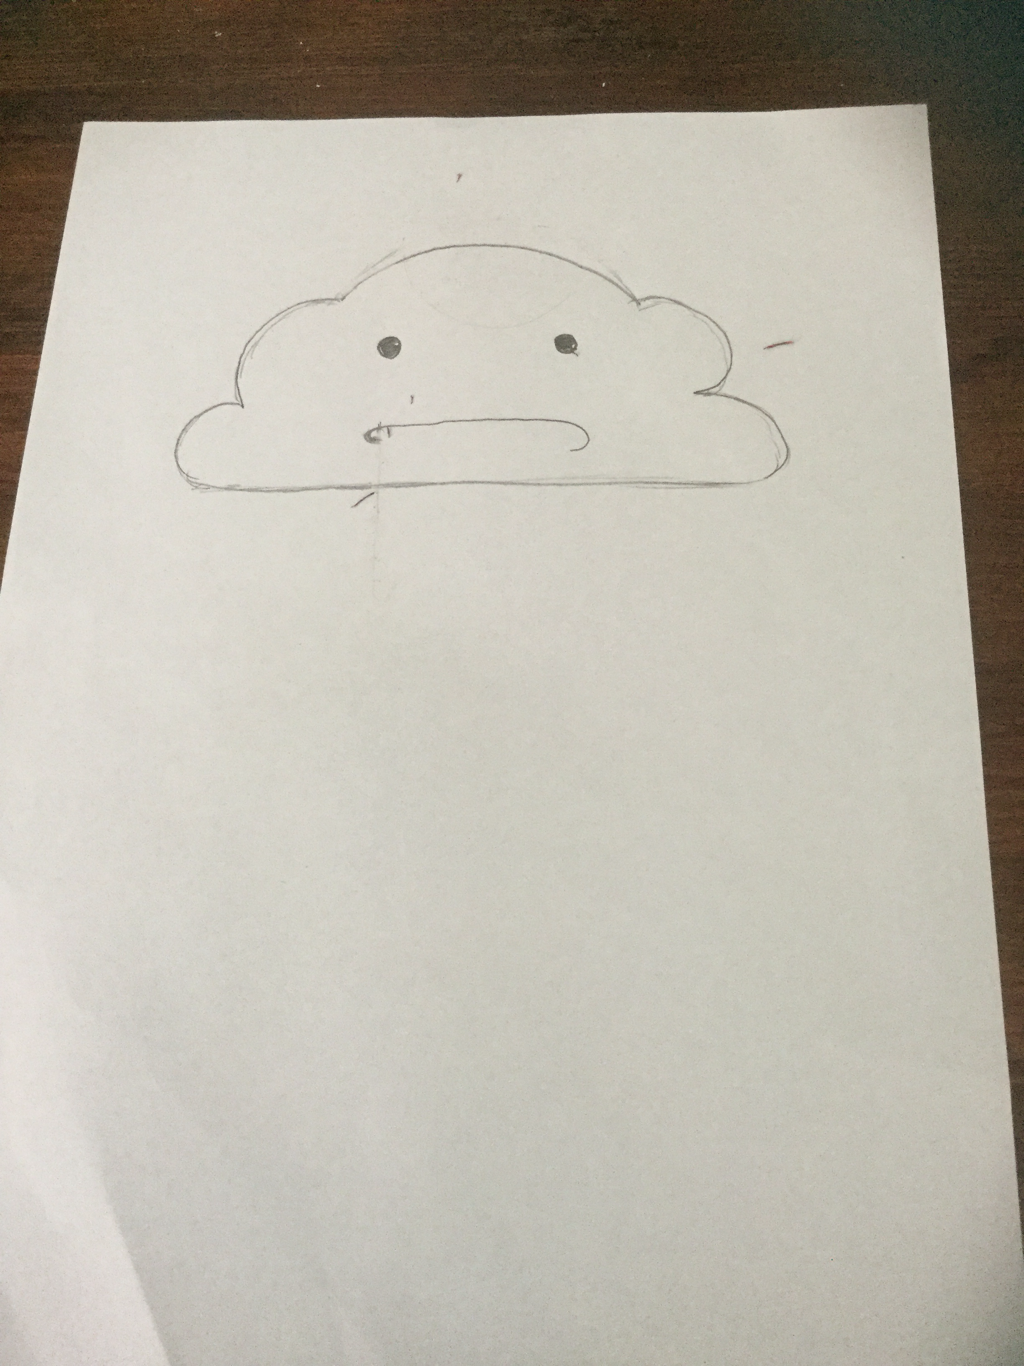 2. Sorry I lost some photoage of this step so I had to redraw. Secondly add a pair of cute eyes and under a straight line. With a curve on each side underneath. 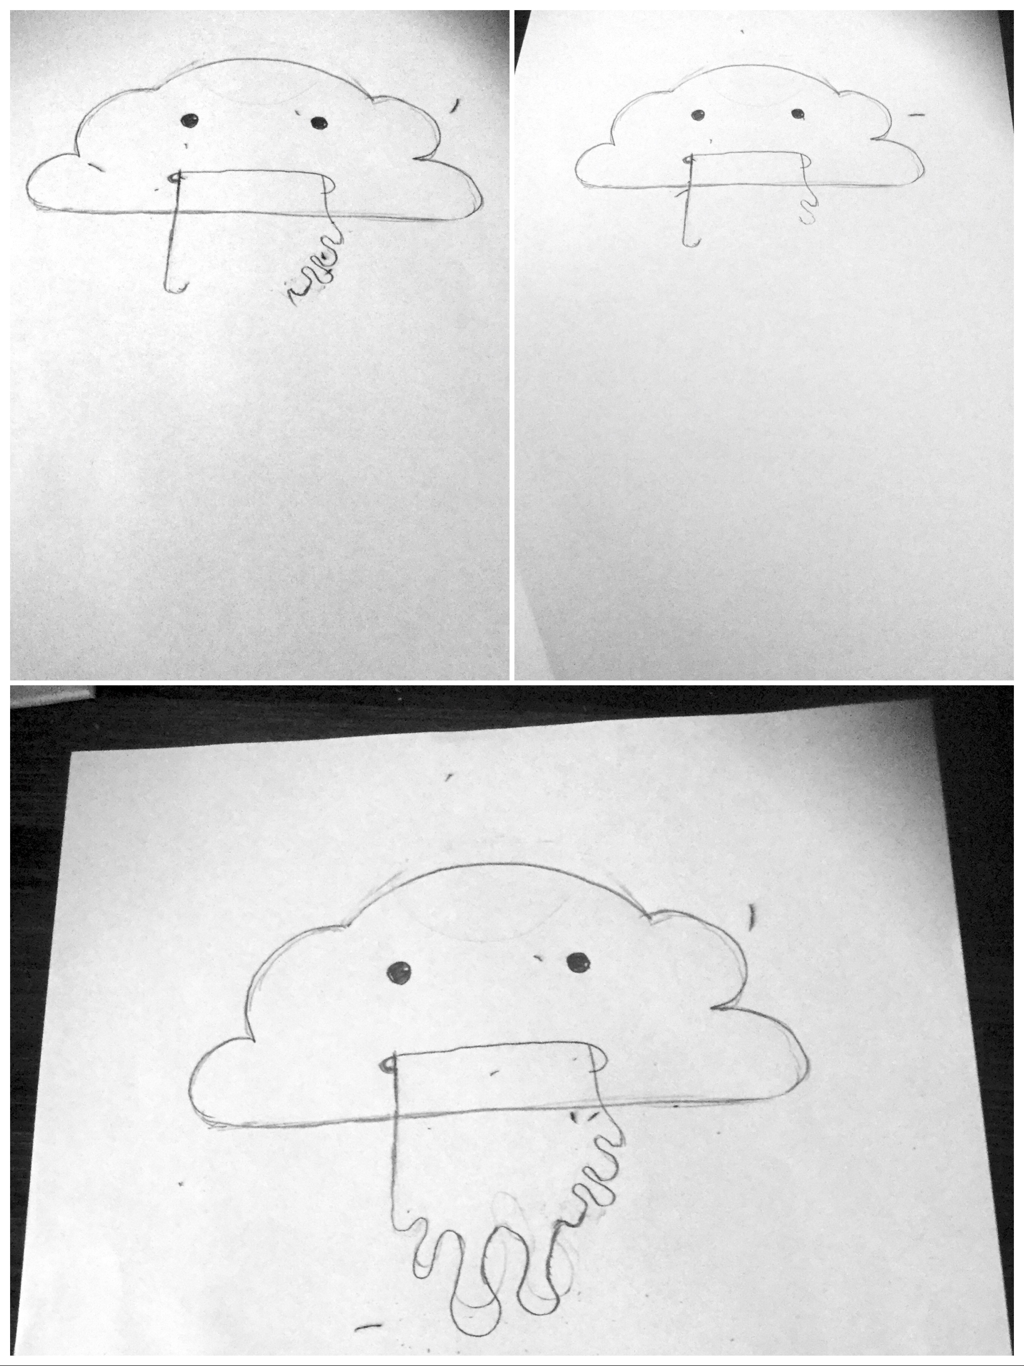 3. Lost the photoage to this step too sorry. Thirdly add random slopes wherever you want. This one isn't as good as the usall one. 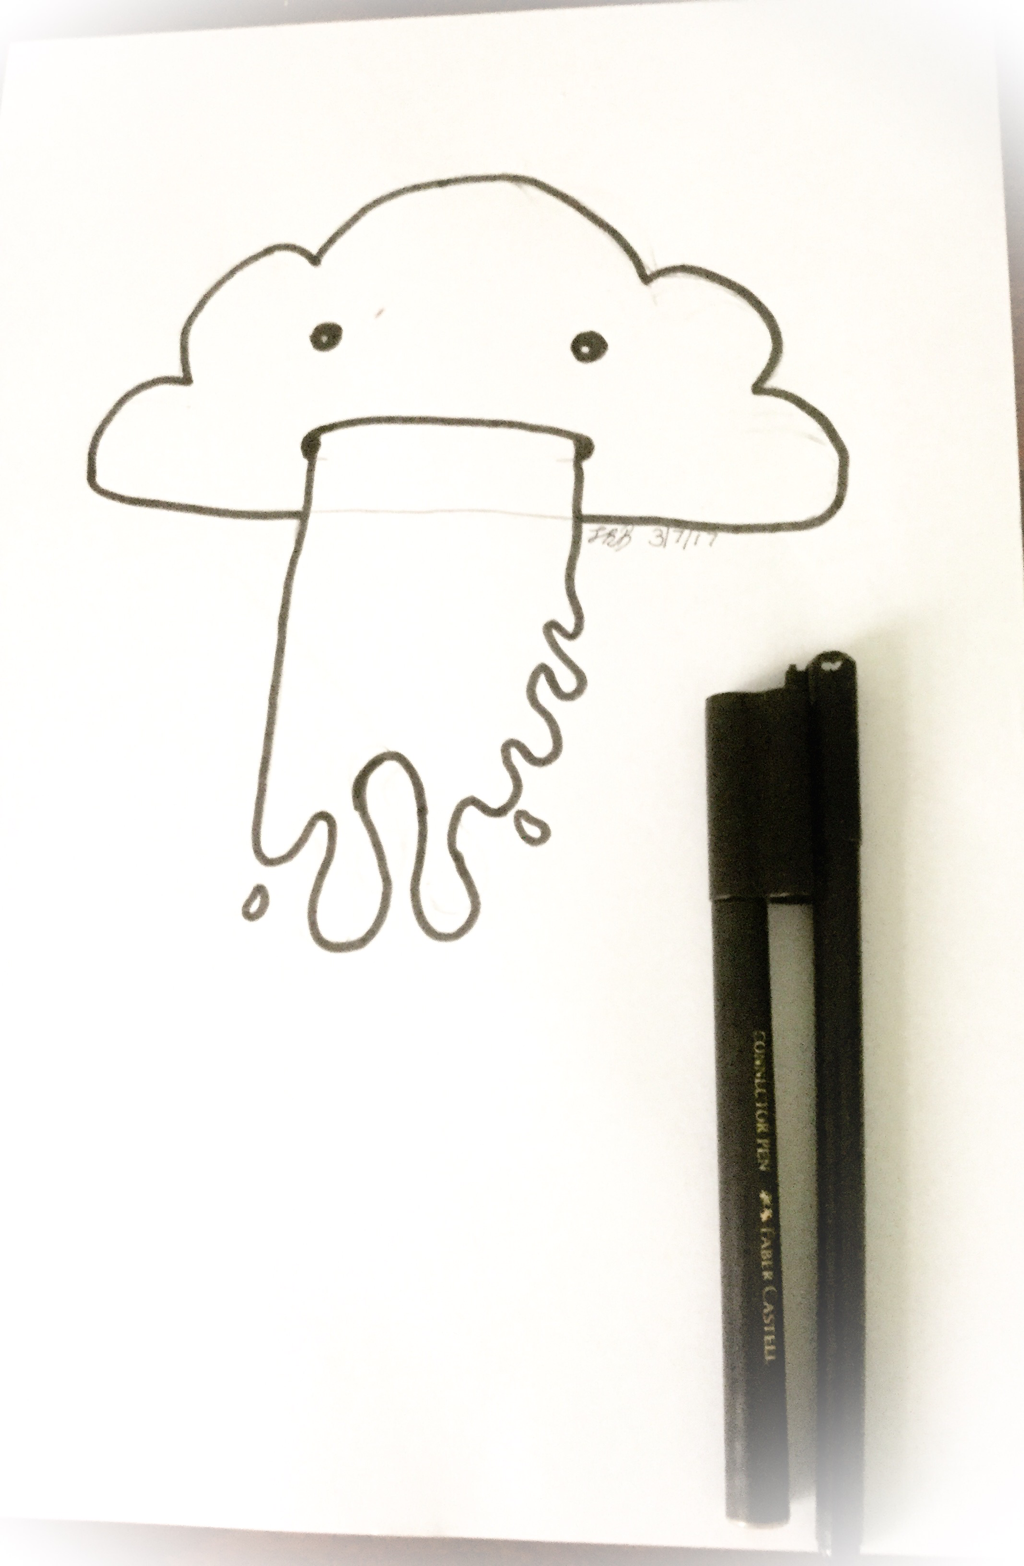 4. Go over with black a texta (best use a thick texta). Remember to always sign your work. 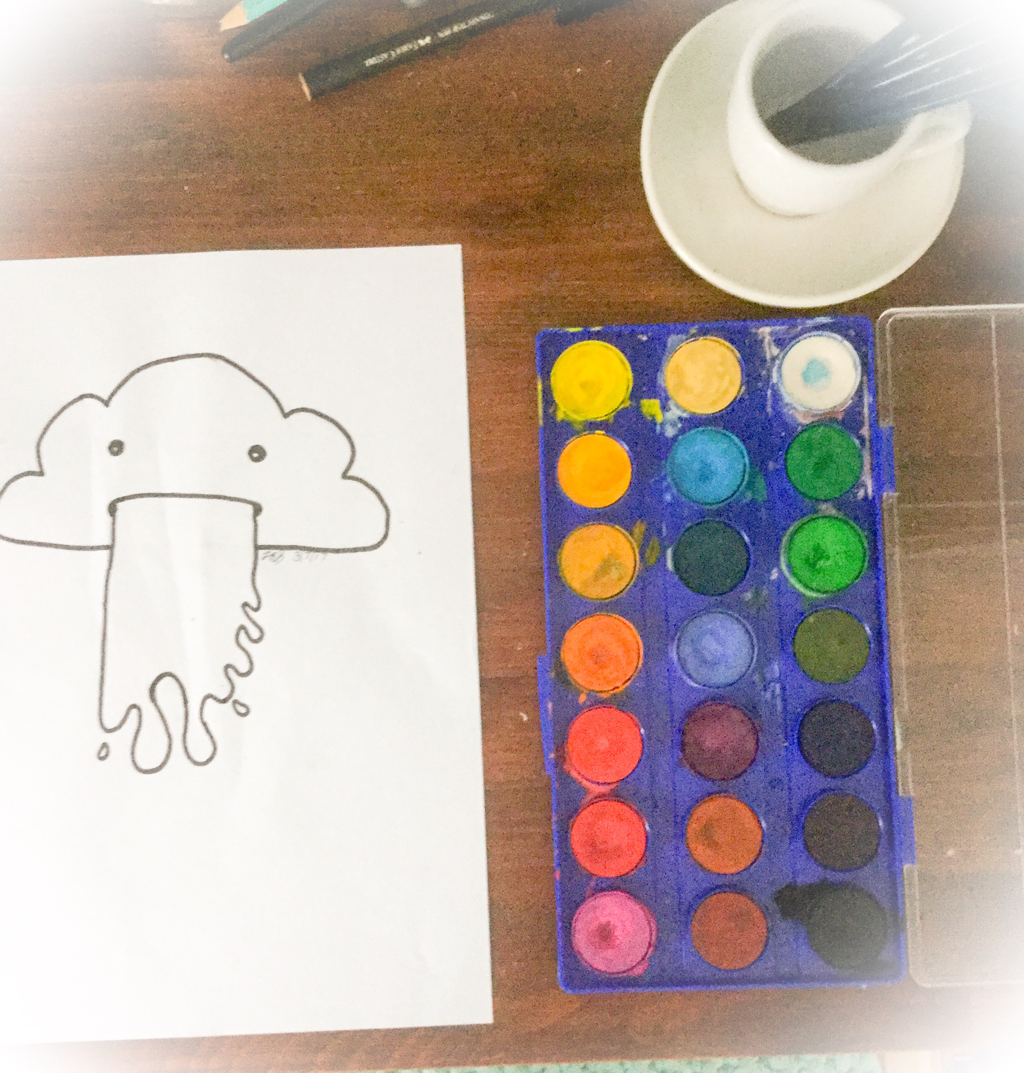 5. Now you can add watercolour if you want. 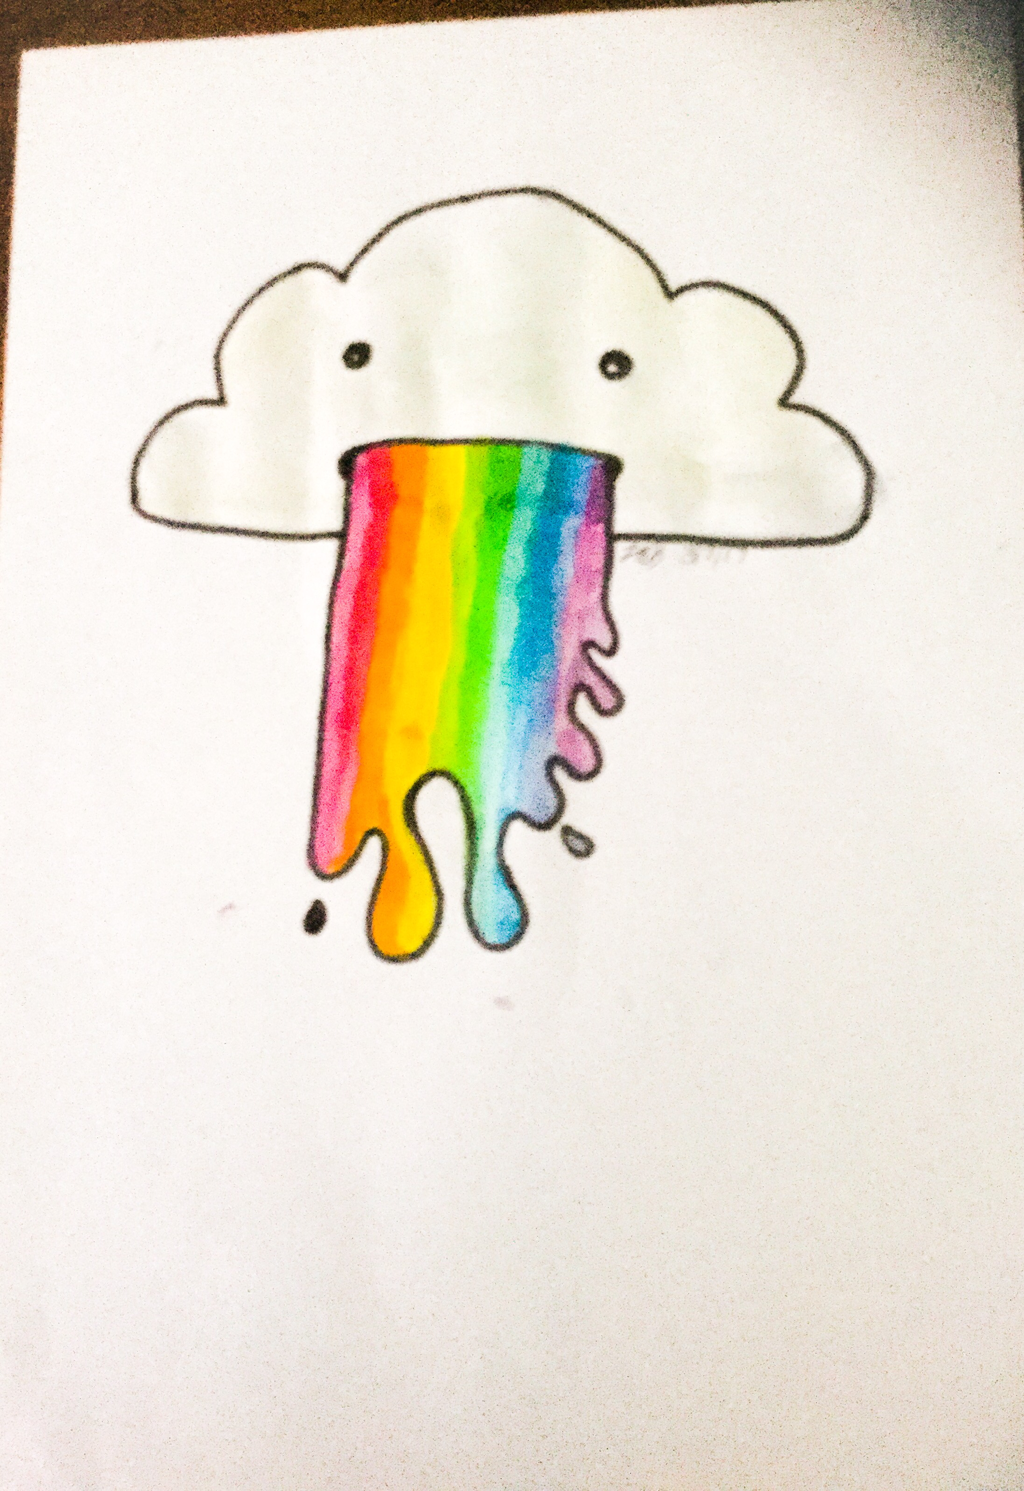 6. Now add colours in the rainbow down the vomit. Also use white to add a cloudy look to the cloud. 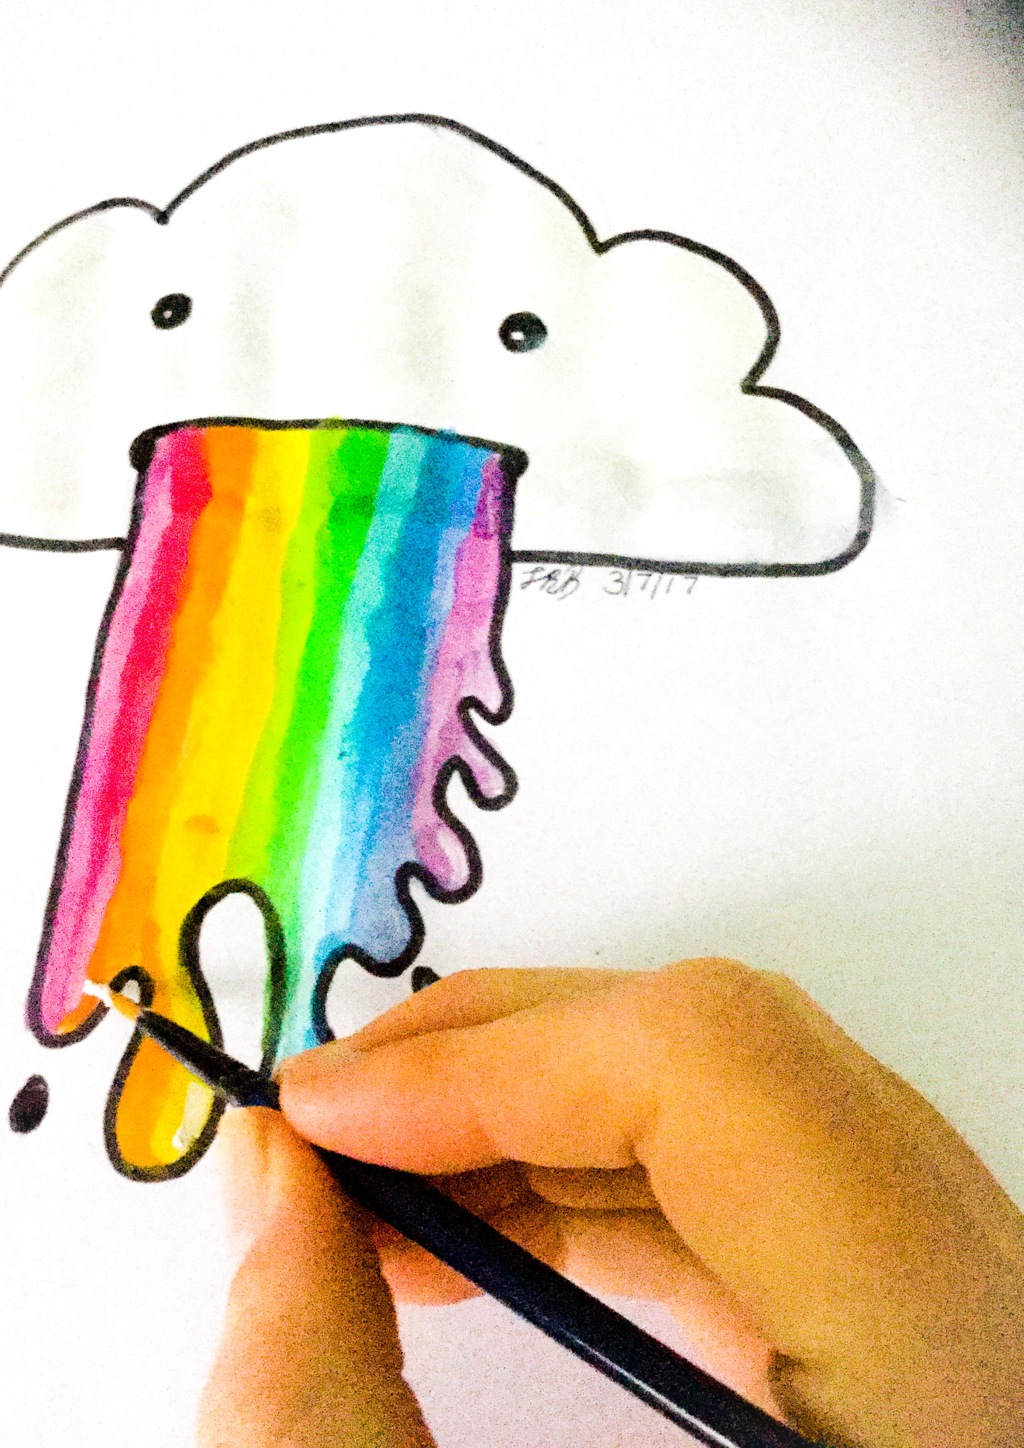 7. This is also optional add some white acrylic paint to add a shiny sparkle to it. 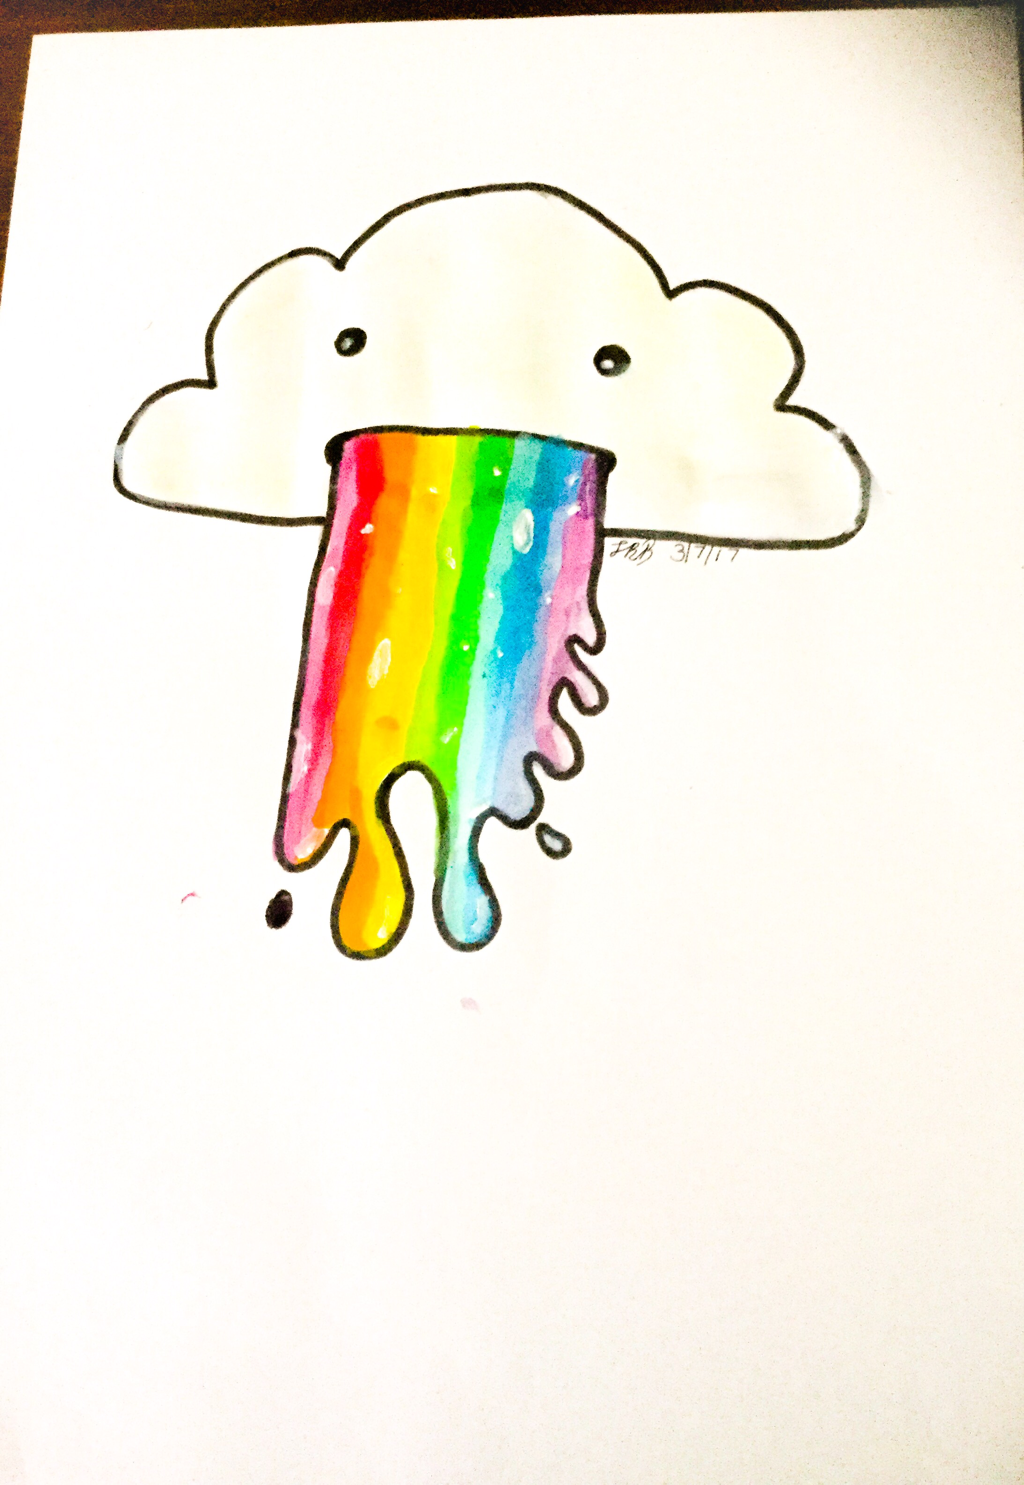 Now you are done hope you enjoyed this drawing and stay tuned for Sunday's post.
 Hey I'm really sorry I haven't posted anything this past 2 weeks or so. I did try and post something which was a time lapse video of me colouring, but I couldn't post the video unfortunately. I might post it on my instagram account (taypaints05) after I have finished editing it. This post is how to make DIY lip scrub. 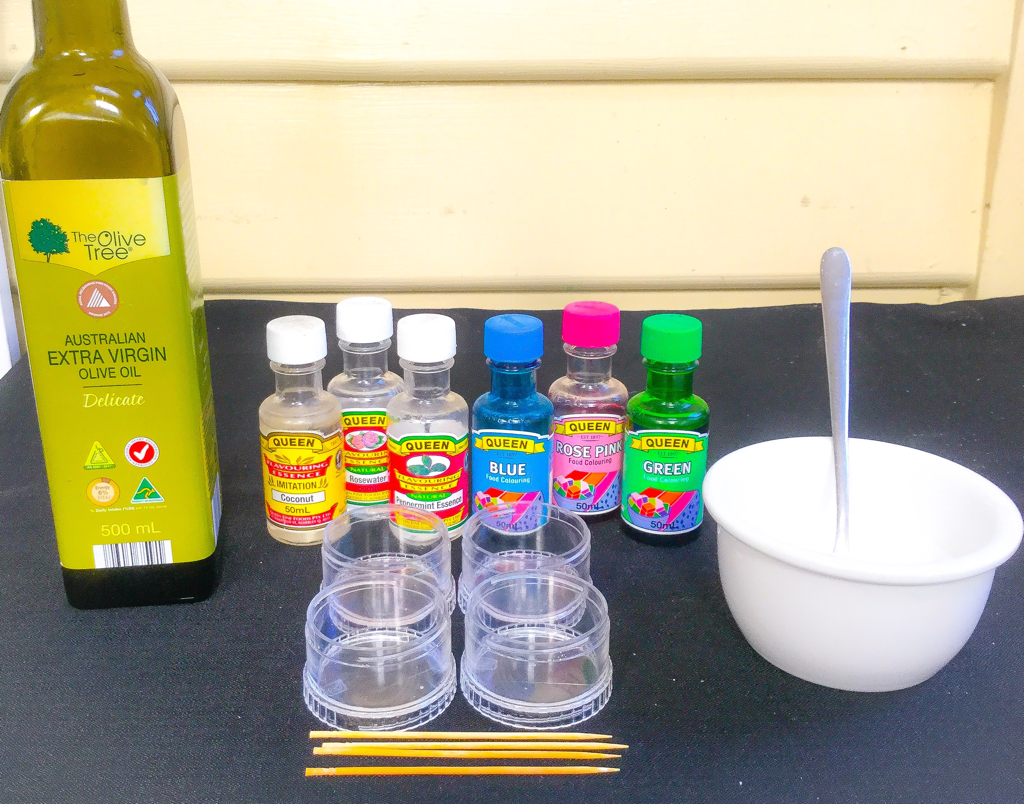 Ingredents:
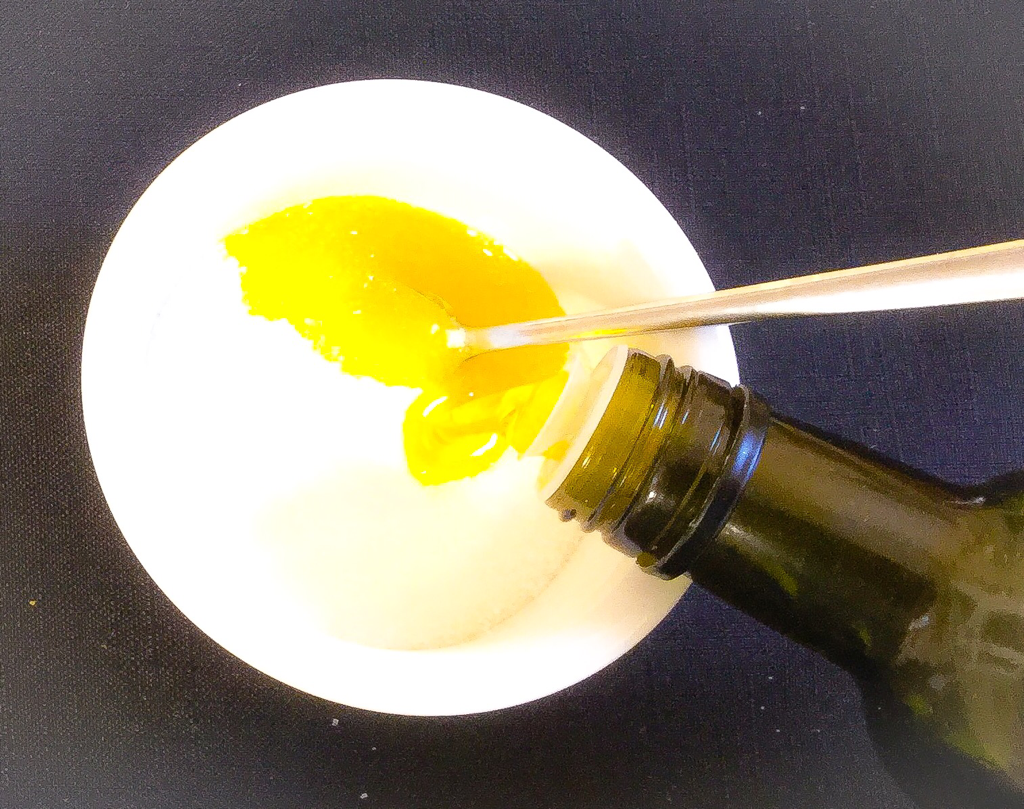 1. Put some sugar into a bowl and some olive oil, mix well and add more sugar if too watery or more oil if still dry. 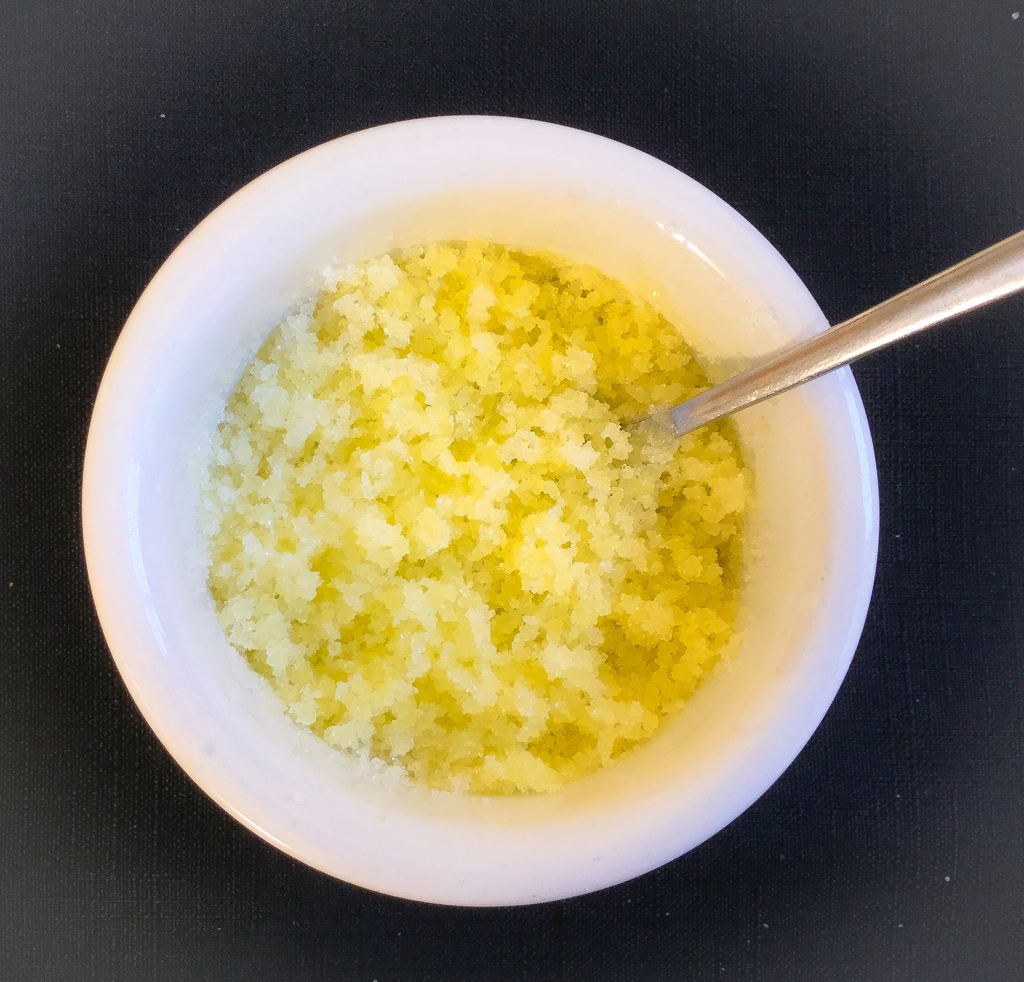 2. This is what it should look like when it is mixed perfectly. 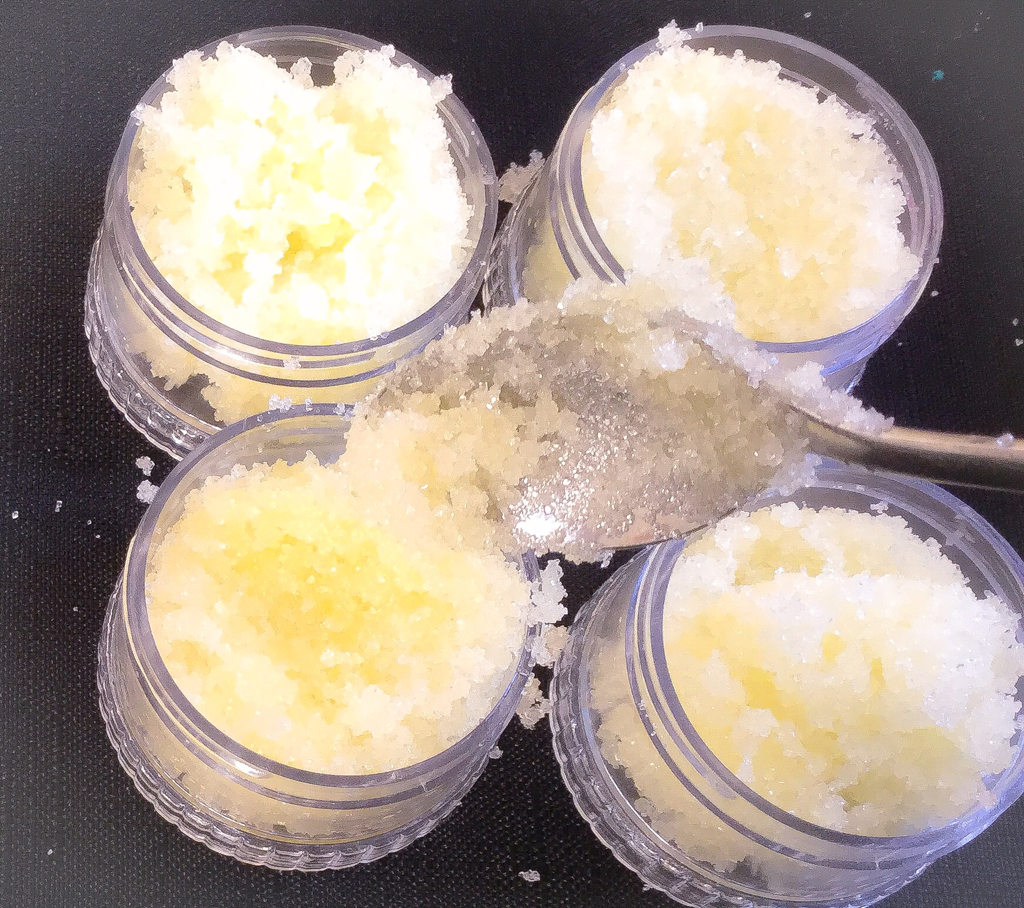 3. Then divide and pour into containers. 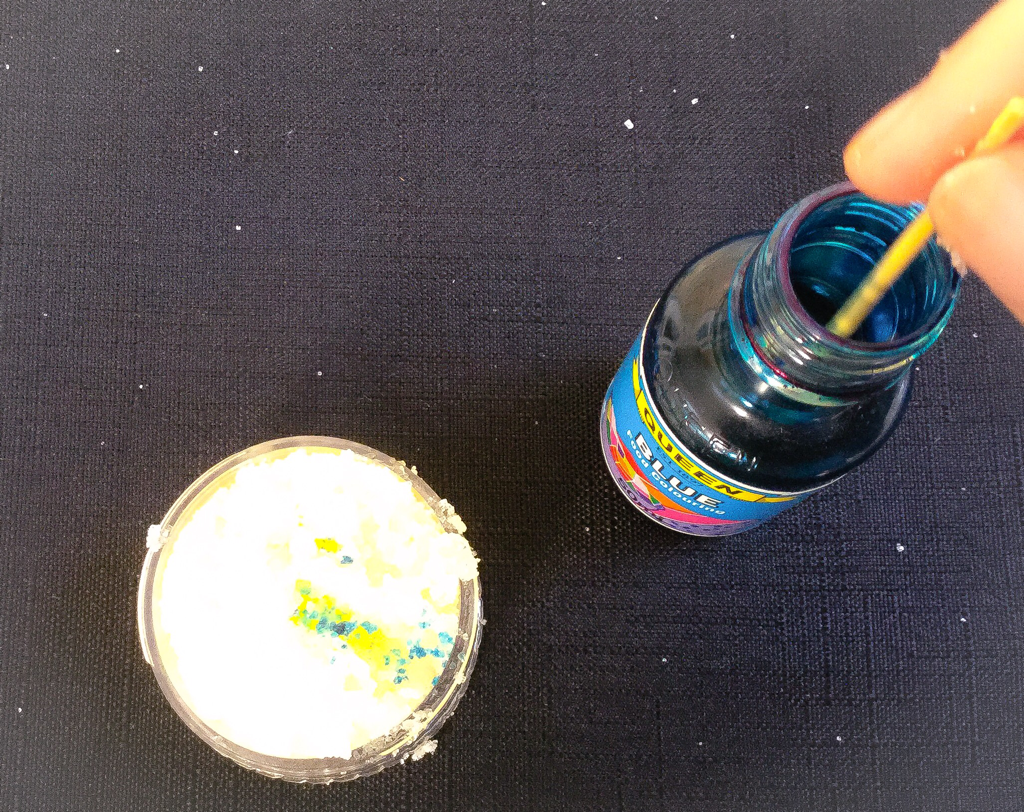 4. Add some food dye into each countainer with a toothpick and make sure you don't add too much or it can stain your lips. 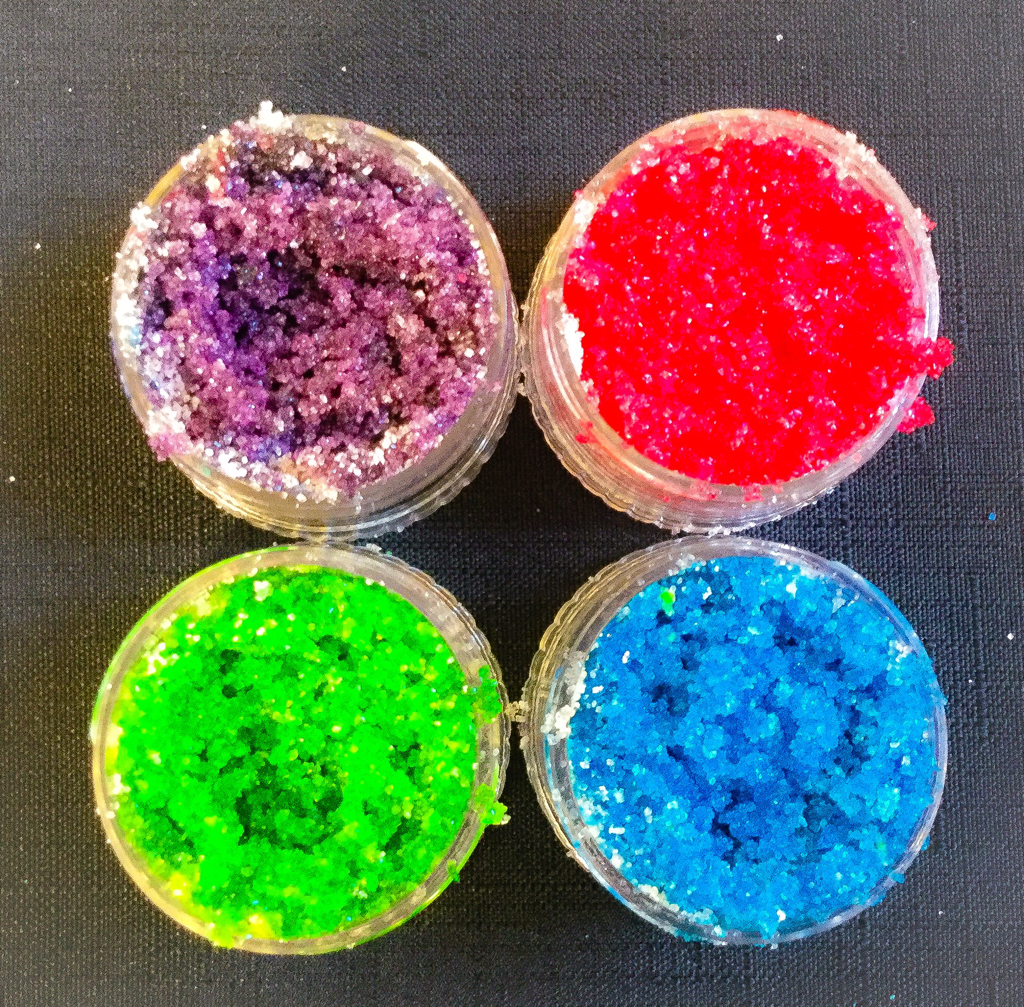 5. This is what it should look like when it's done. 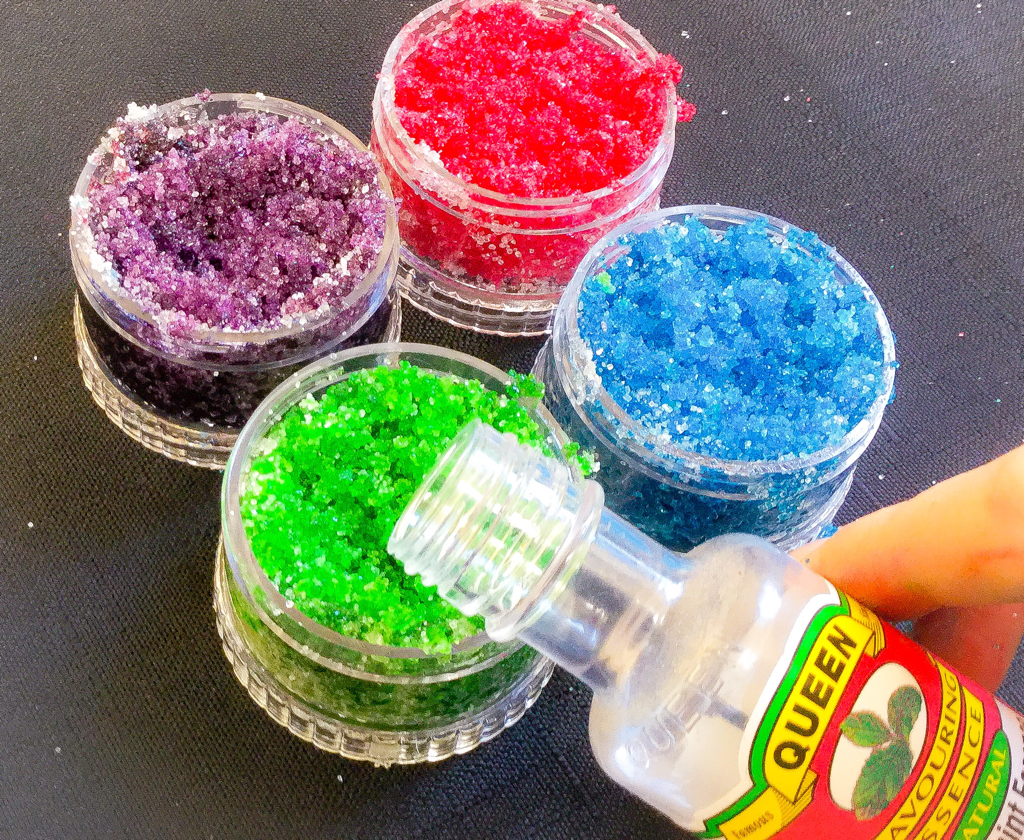 6. Then add food flavouring to each countainer and mix with a toothpick. 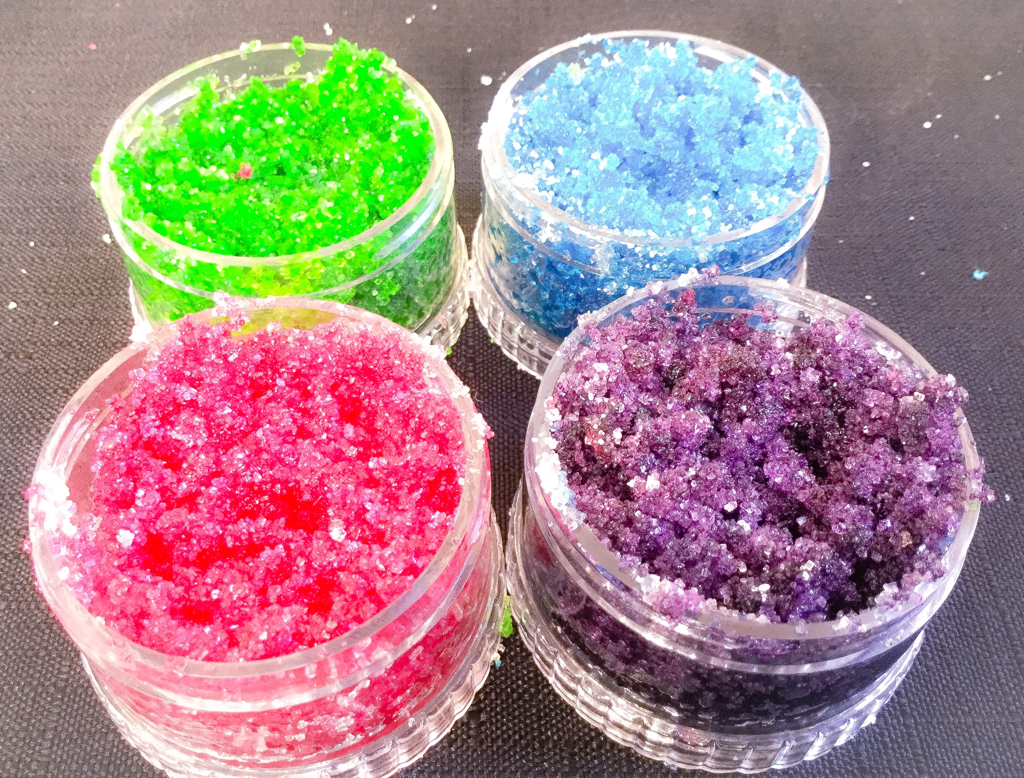 7. This is the finish product. Have fun with your new lip scrub.
|
